

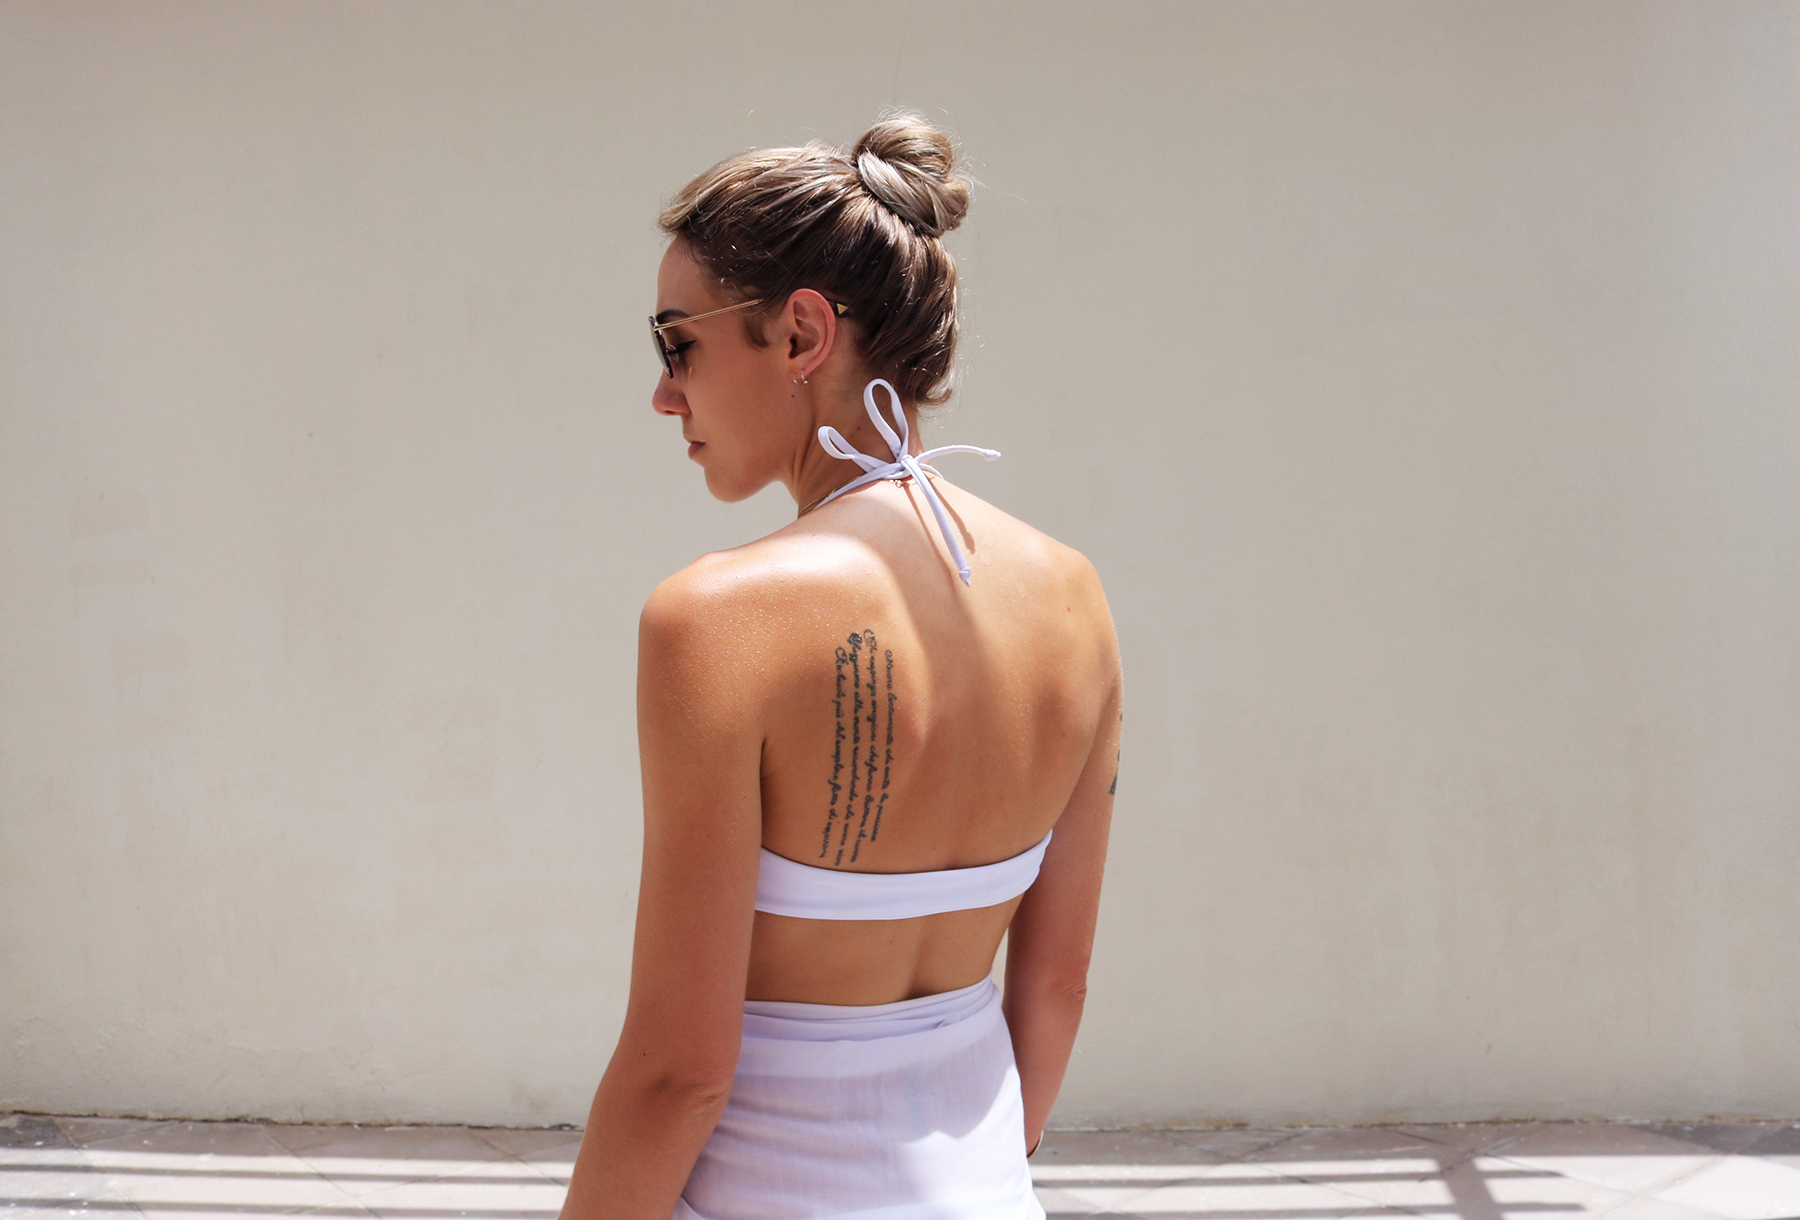
Might as well accept that everything I'm making these days has laces in it. Dubai summer is starting to sizzle so getting geared up for the next 4 months.. If I had used a colour other than white, the soft cups wouldn't necessarily have been required - but for this not to become fully transparent when wet, they were non-negotiable.
Tutorials take a lot of time & effort to create, and I choose to make mine available for free. If you enjoy this guide, you can support me with a donation that feels right for you, here.
TOOLS:

Lycra or other swimsuit-worthy fabric, about 0.5 m | Soft cups (optional, especially if your fabric is pretty firm. I ended up using different ones than the ones pictured here, the cheap kind that's in H&M bikinis works best!) | Scissors | Thread | Not in the image but regular string to make your straps, or alternatively ready elasticated strap if you can get your hands on some that matches your fabric
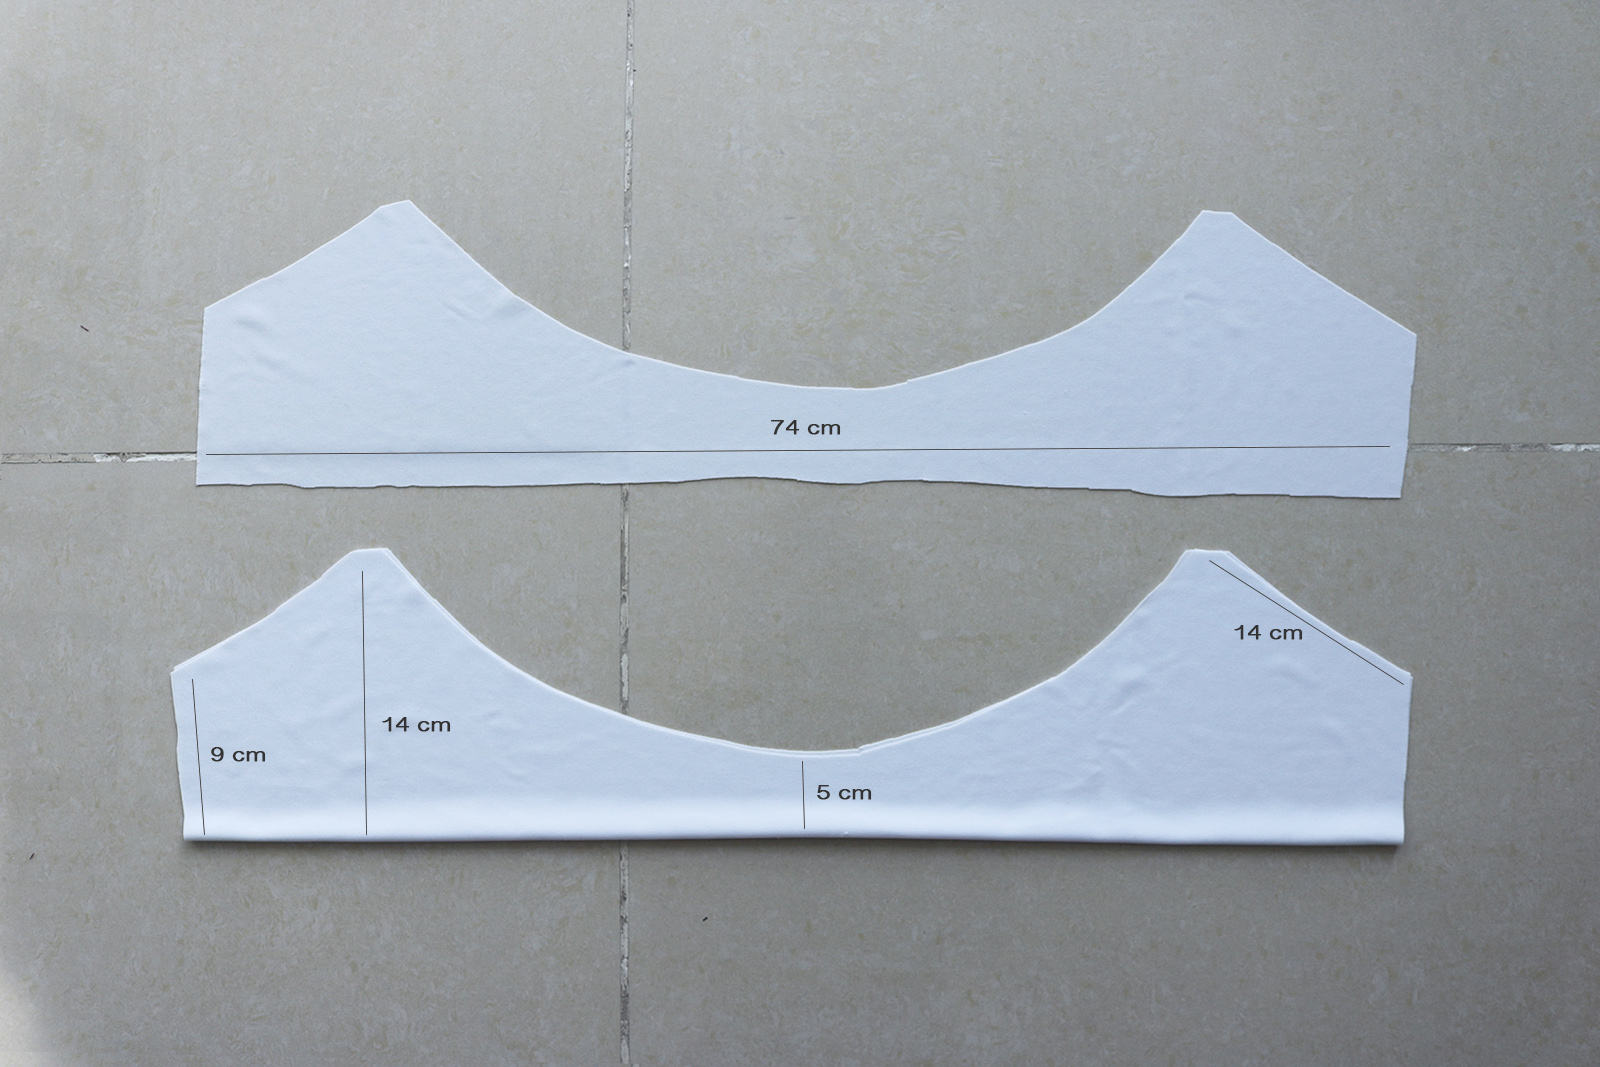
I. First I cut out the pieces. I did my top in 4 layers due to the thinness of the lycra. If yours is thicker then a single layer should be fine (like the above piece). I cut mine double so that the long edge was a fold (the lower piece). My under-bust circumference is about 81 cm.
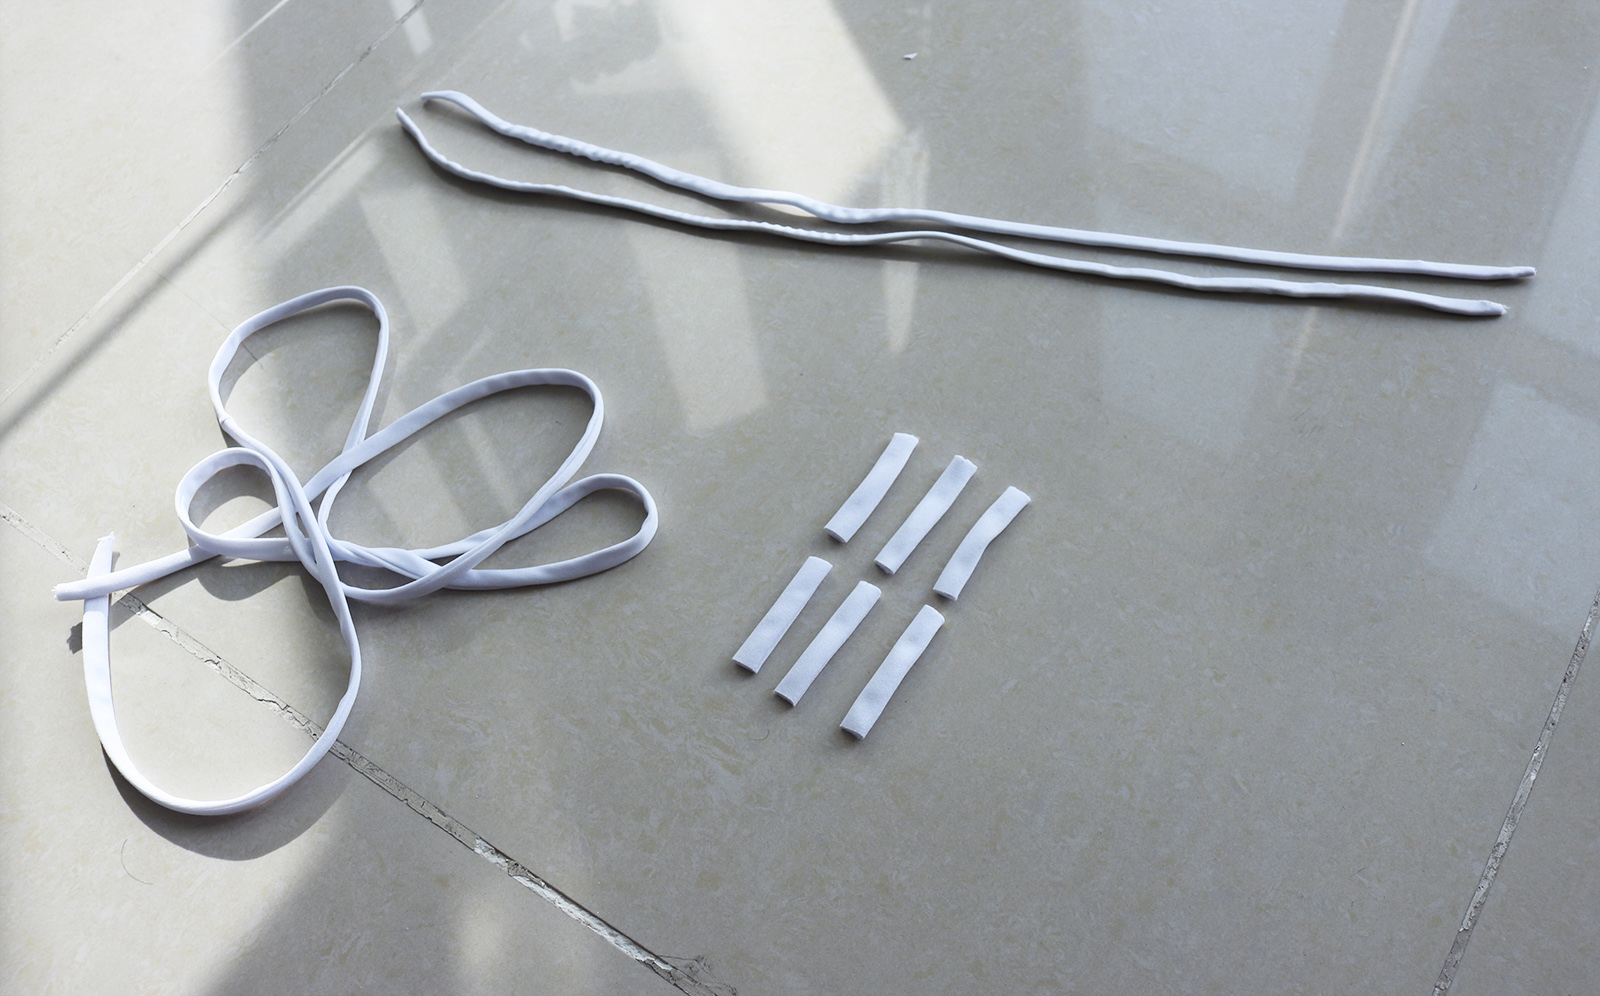
II. Then I made my string. I used the method I've shown in this post. Need quite a bit of it - 6 short pieces bits about 4 cm long, two identical pieces about 30 cm long for the halter straps, and one string to do up the lacing in front (mine was about 1m). To give my halter straps more holding power, I inserted a strong, thin elastic inside with the help of a very tiny safety pin after completing the string. Again, not necessary if your fabric is firmer.
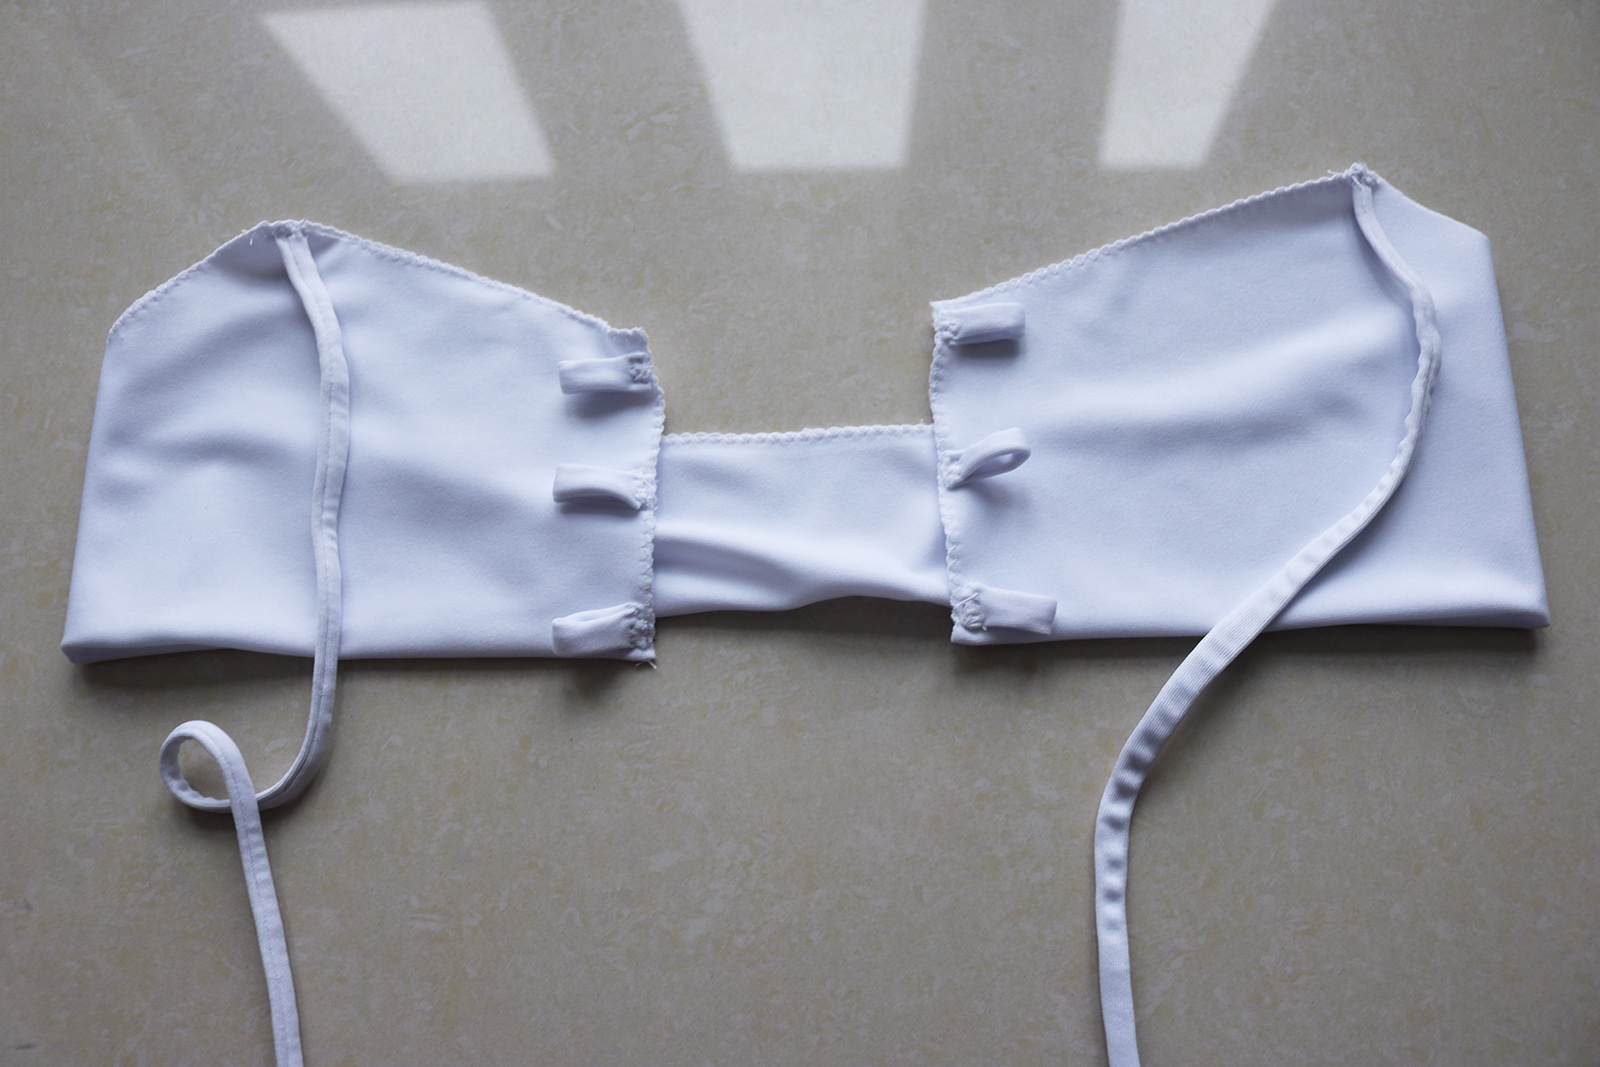
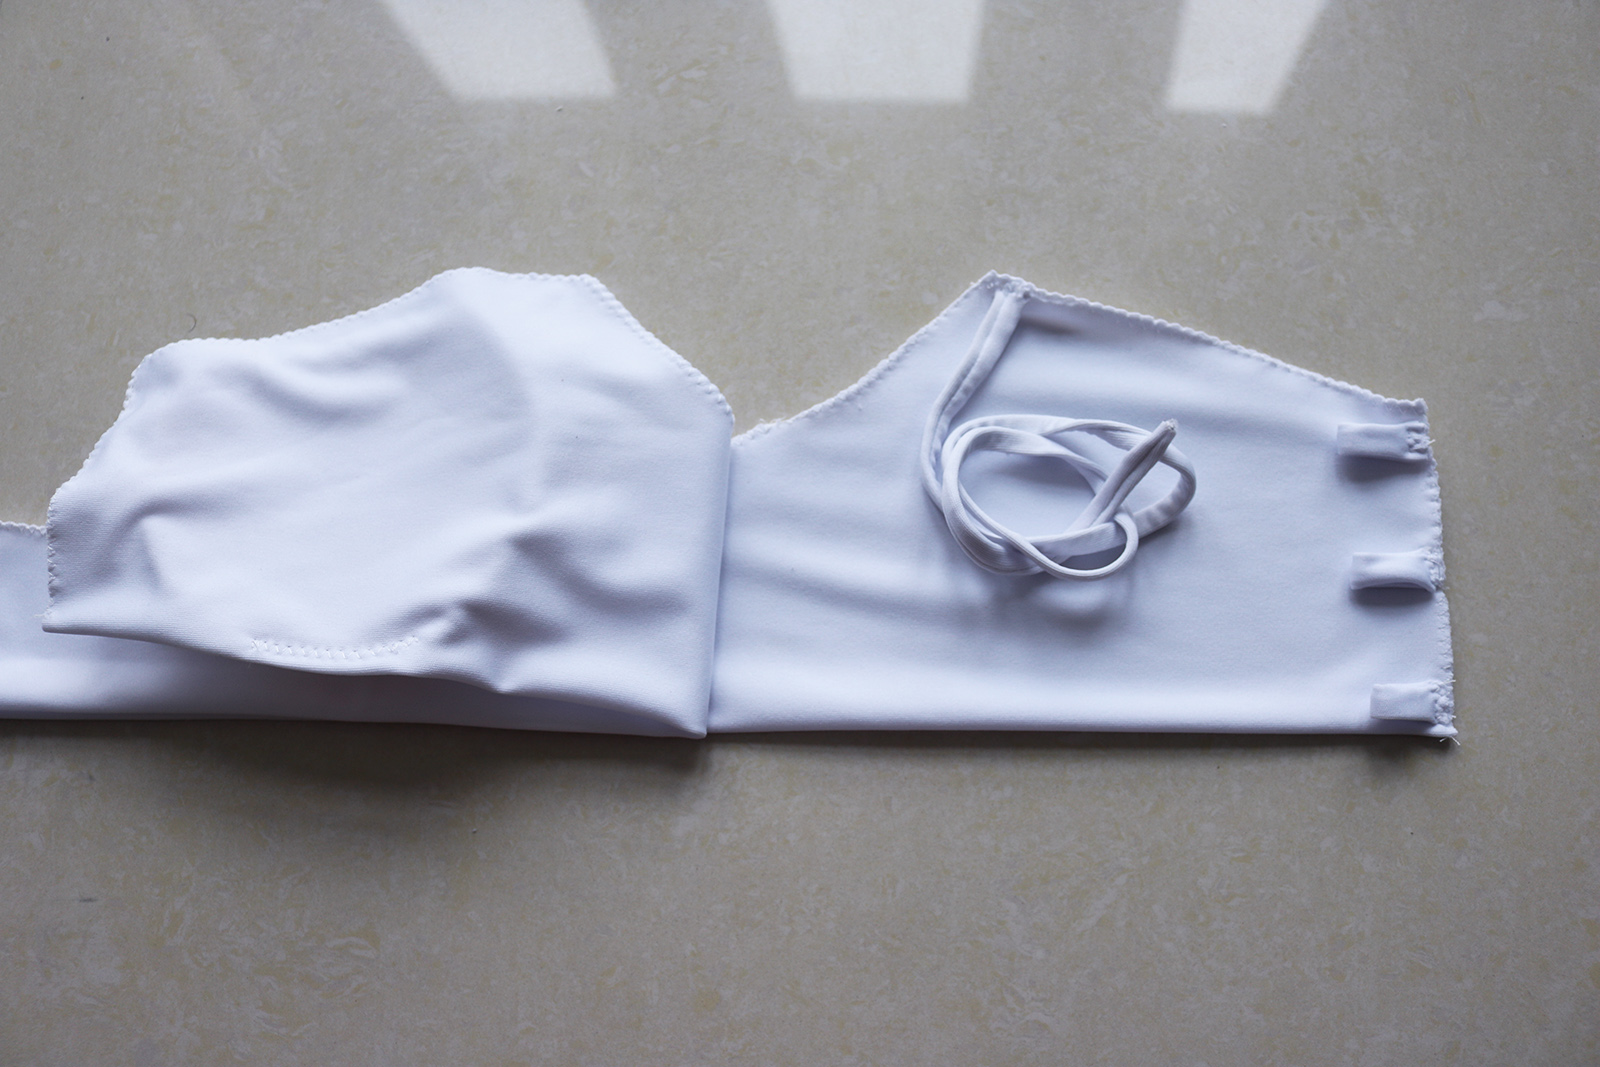
III. Next I zig-zagged the edges of my doubled pieces together just make it easier to work with one piece. Then I took the little pieces of strap, folded each in half and quickly stitched them at even distances along the center front edges. Also stitched the halter straps in their spots.
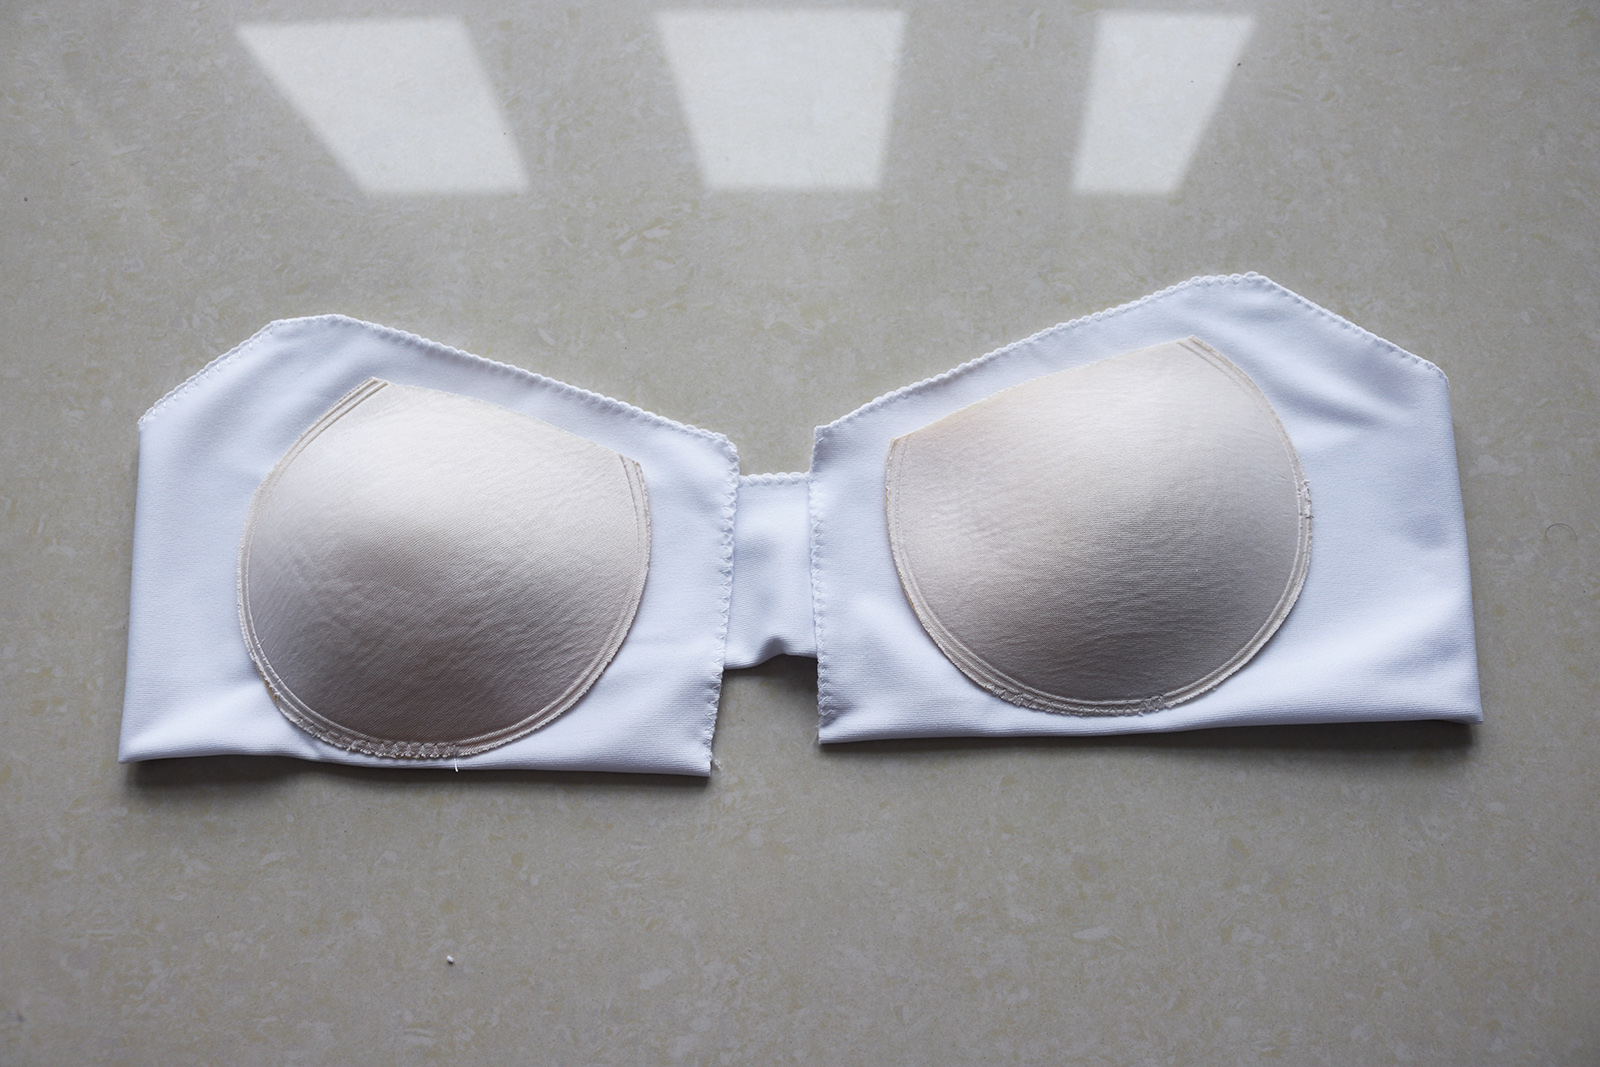
IV. Then I took the other piece (that one also double-layered) and adjusted the size of the soft cups by cutting just a bit off:
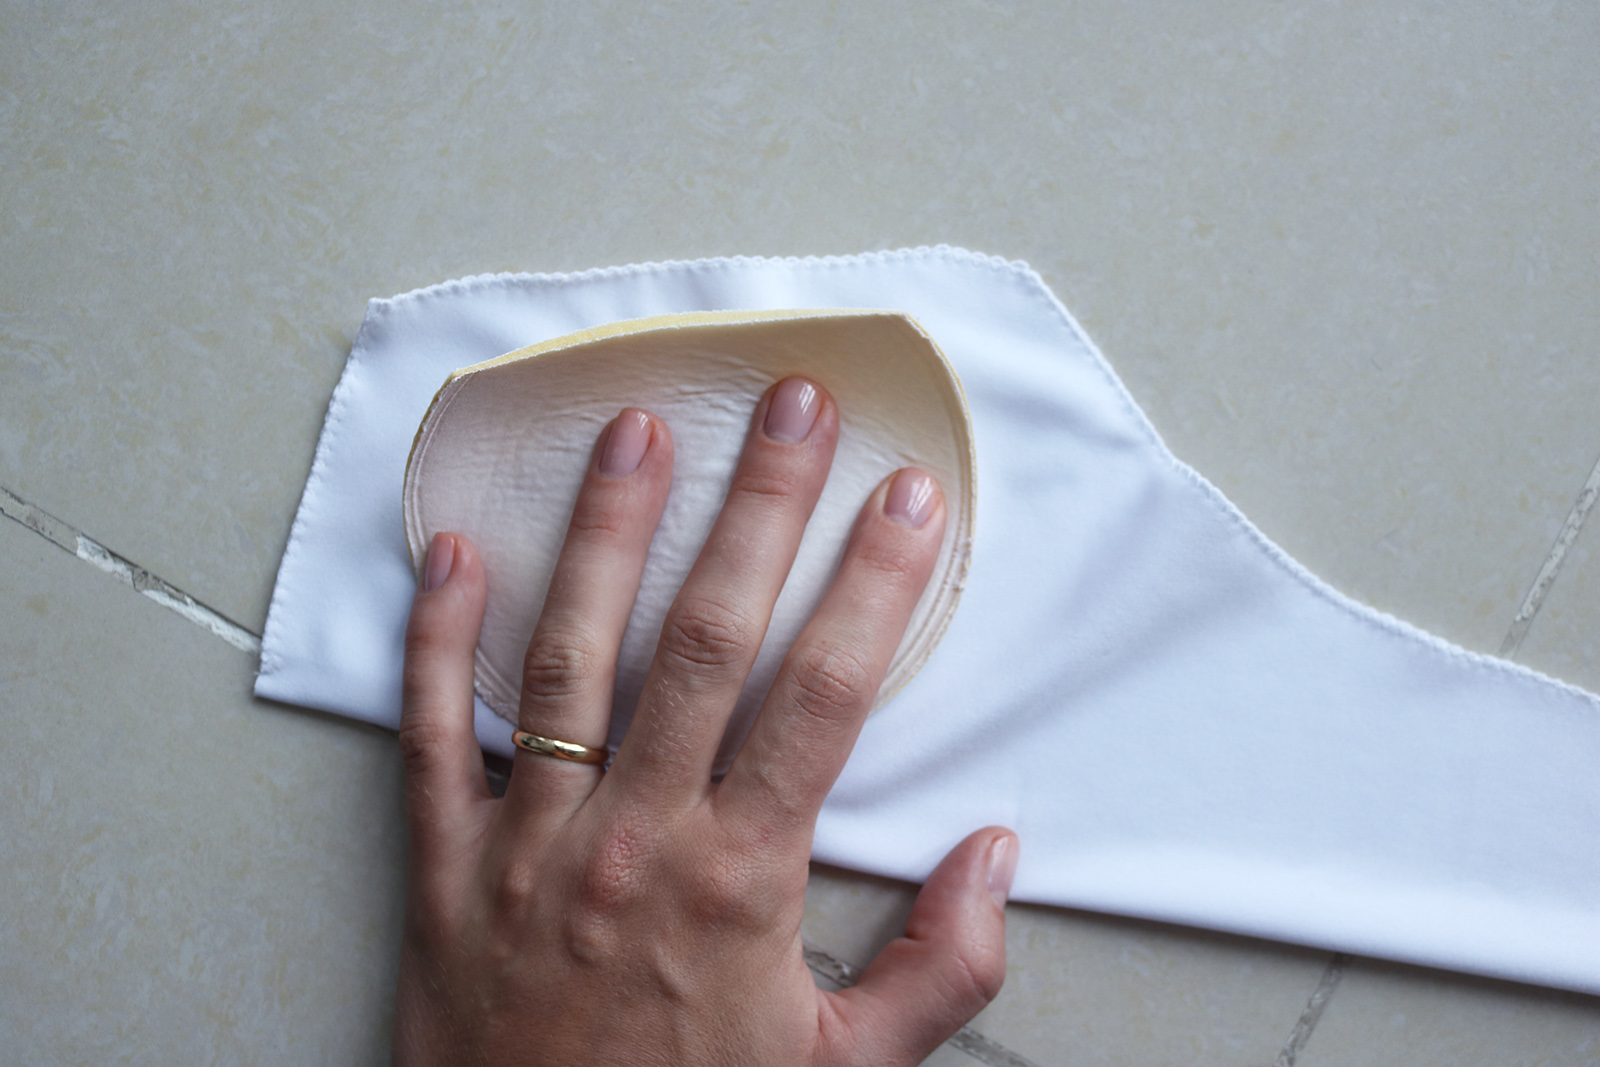
.. So that they were the right size when I sewed them into place (about 3 cm from the center front edge). Just did a quick zig-zag for a few cm along the bottom edge.
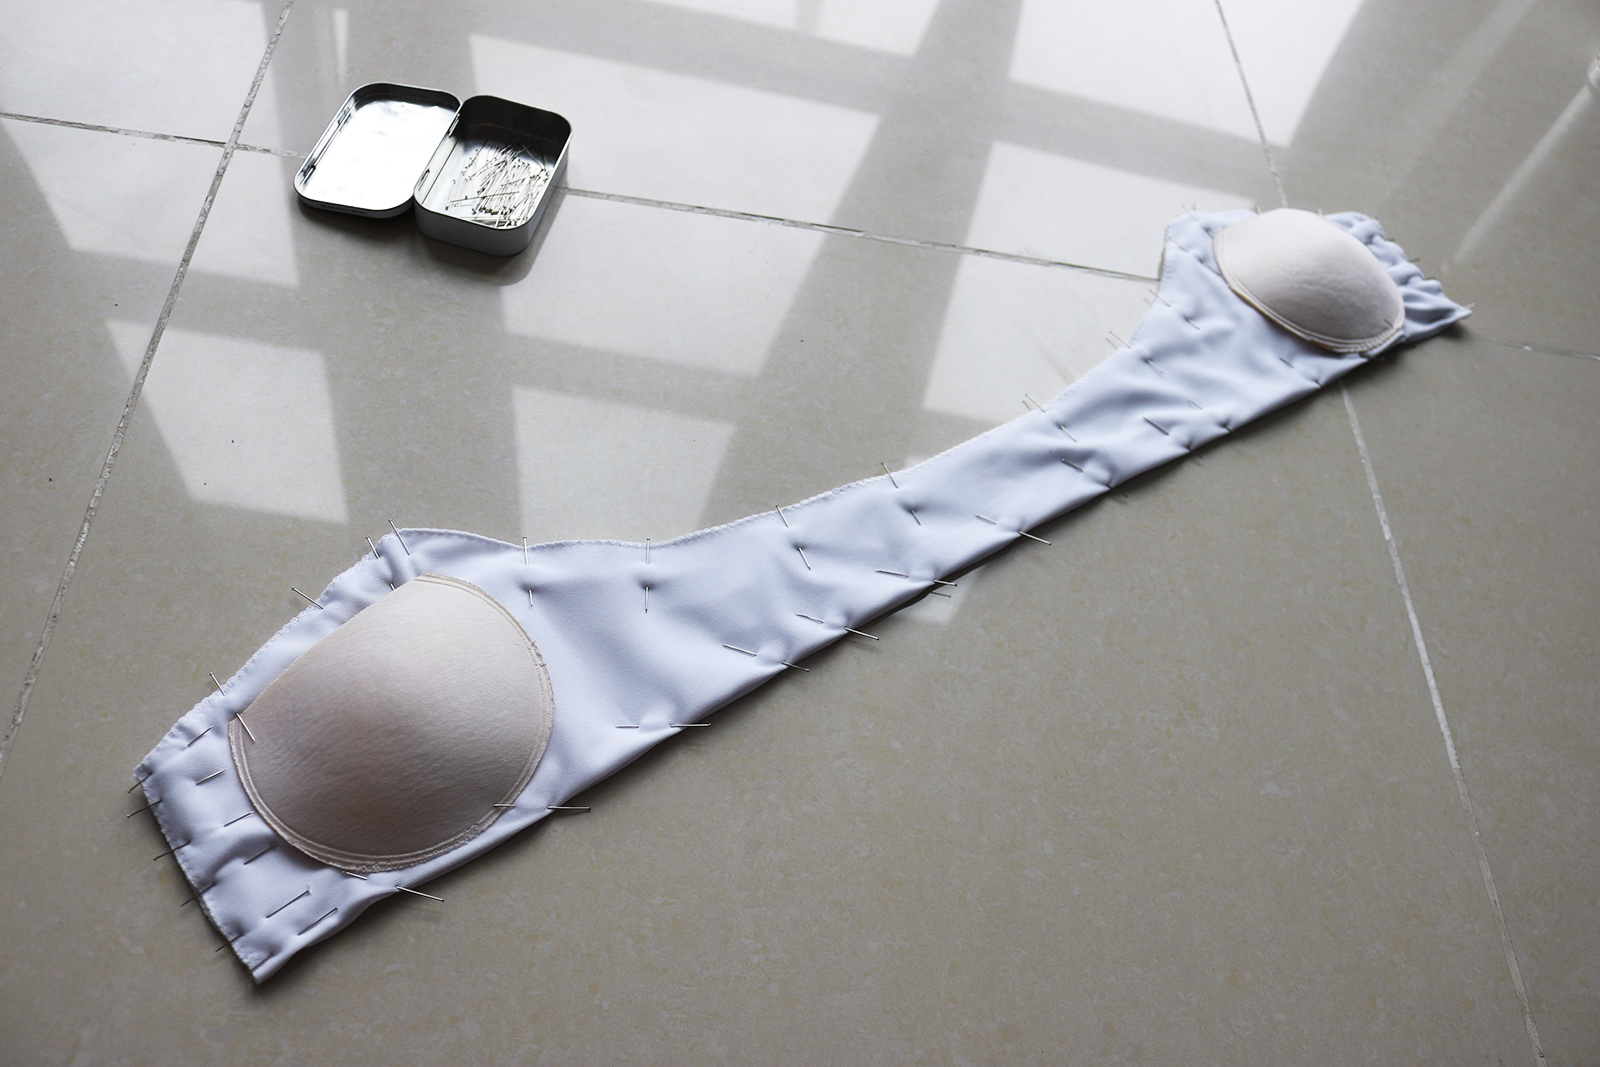
V. Then I placed my two pieces - the one with the cups attached, and the one with the strings attached - together, the side without the cups against the side with the strings. You need to make sure at this point the whole halter string is nicely tucked inside..
.. So you can pin the sides together. Then just sew around using a stretch stitch, making extra sure you leave a gap somewhere at the bottom (you can see how I left a longer space in between the pins towards the cup on the right side in the image below, I started sewing at the other pin and stopped when I had gone all around and gotten back to 8 cm from where I started. When pinning, also make sure all the strings (the little loops that will hold the lacing and the halter straps) are aligned straight (as you can see from the image, I used my pins to pin very close to them to make sure they stayed put).
VI. When you're done it should look something like this! I went back and forth a few times over all the straps to make them extra secure. At this point I had that feeling of disbelief - could it really have been this easy? A feeling that so very often with sewing projects is fleeting as you comprehend.. no, it wasn't. But this time, YES! all that's left to do is to trim the corners just a bit, and then use the gap you left to turn the entire thing right side out!

Final step is to just hand-stitch the gap closed. Whaat!

xo,
Julia


0 comments:
Post a Comment
I would love to hear what you think and learn about your DIY adventures! If you use one of my tutorials, tag me on social @contour_affair, I'd love to see!