

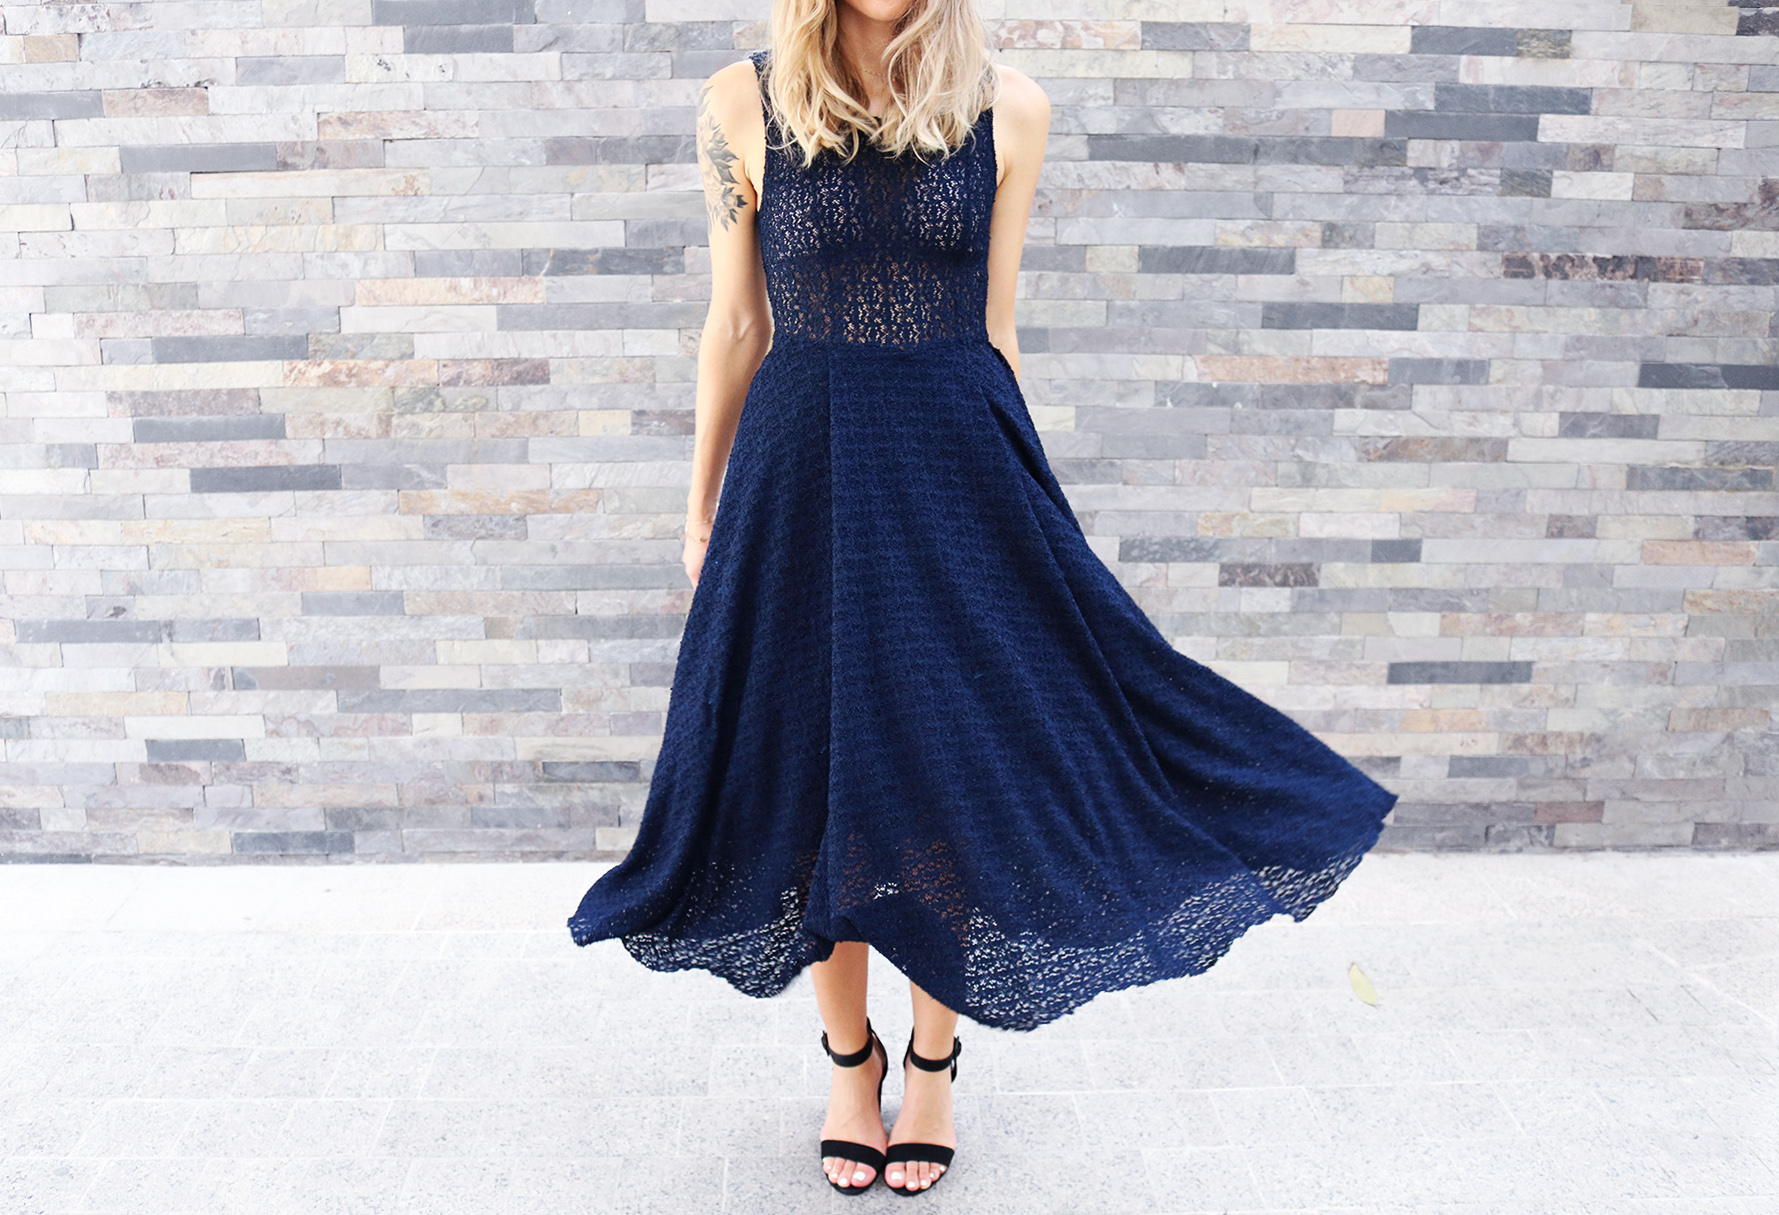
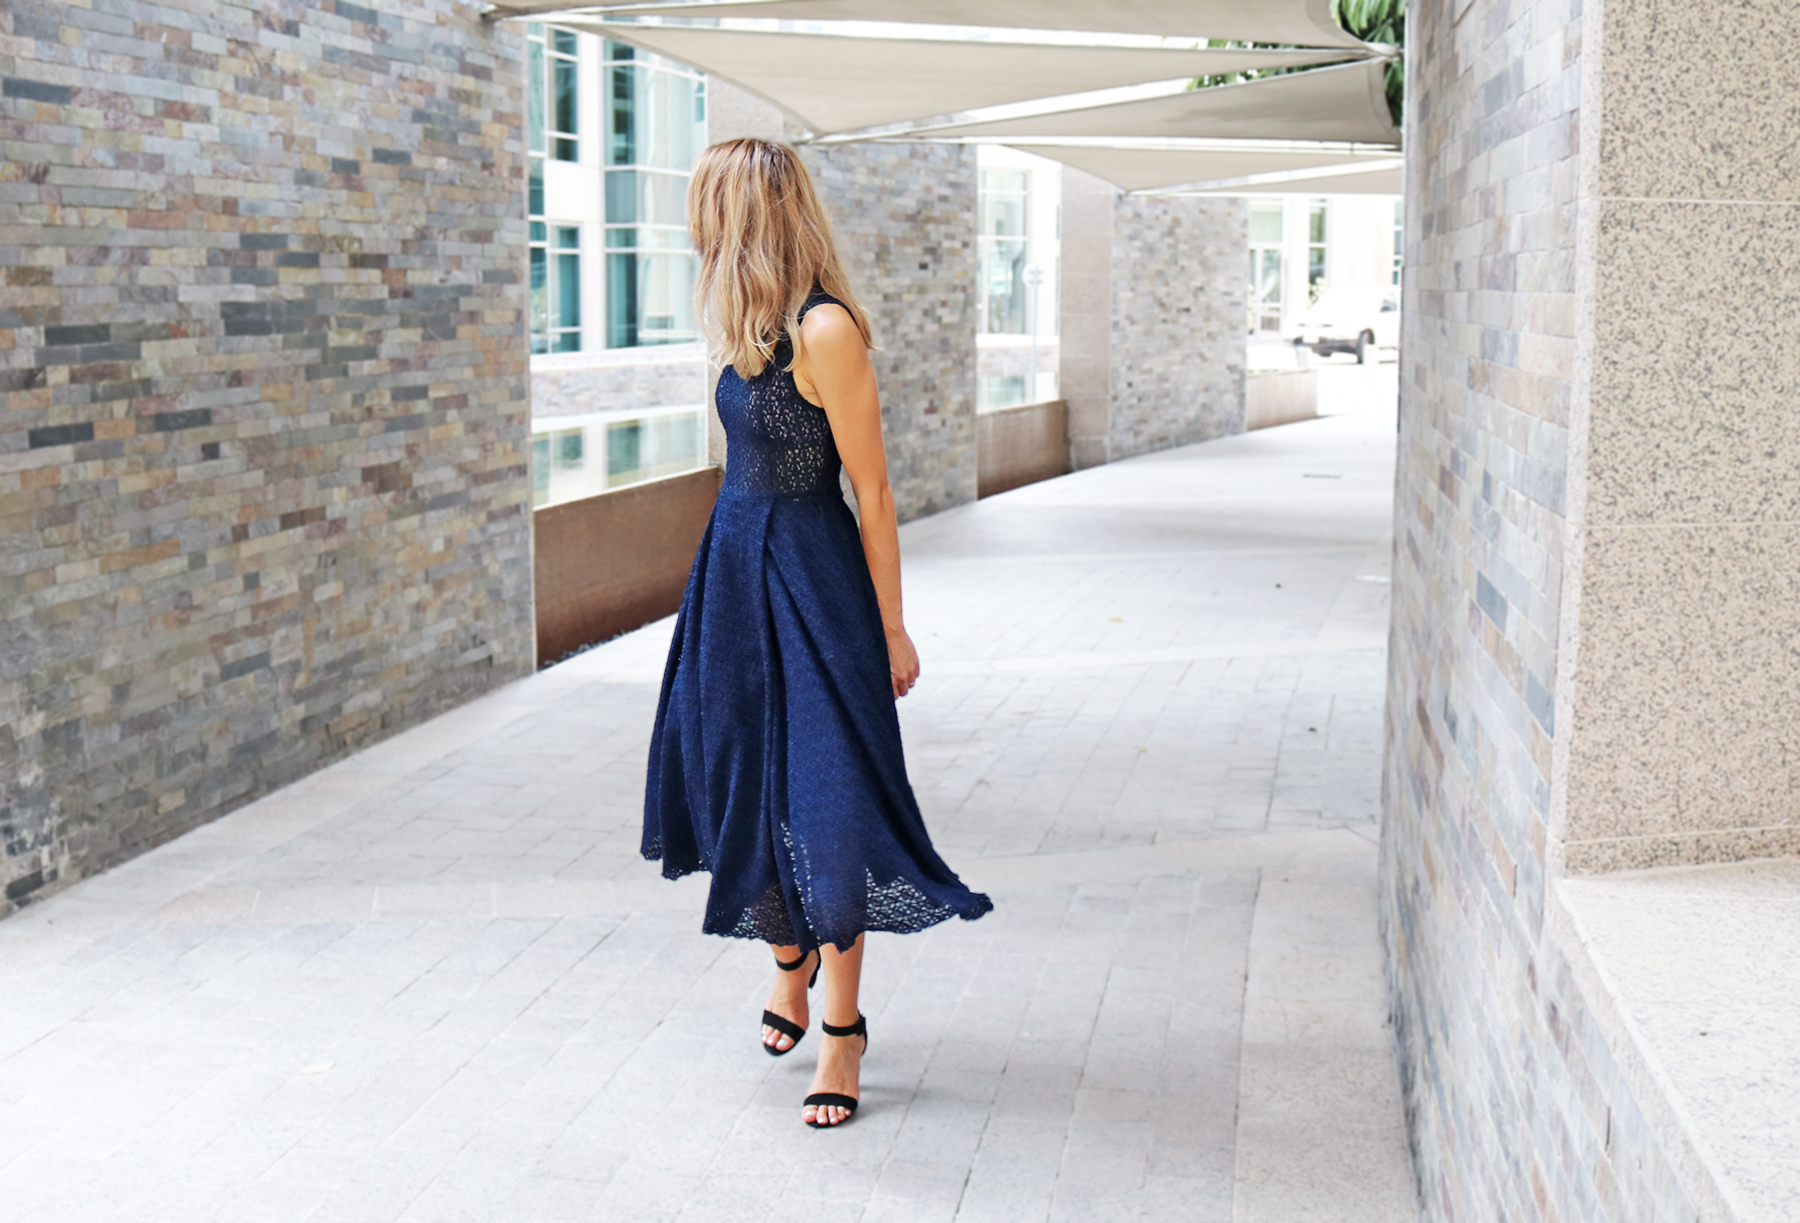
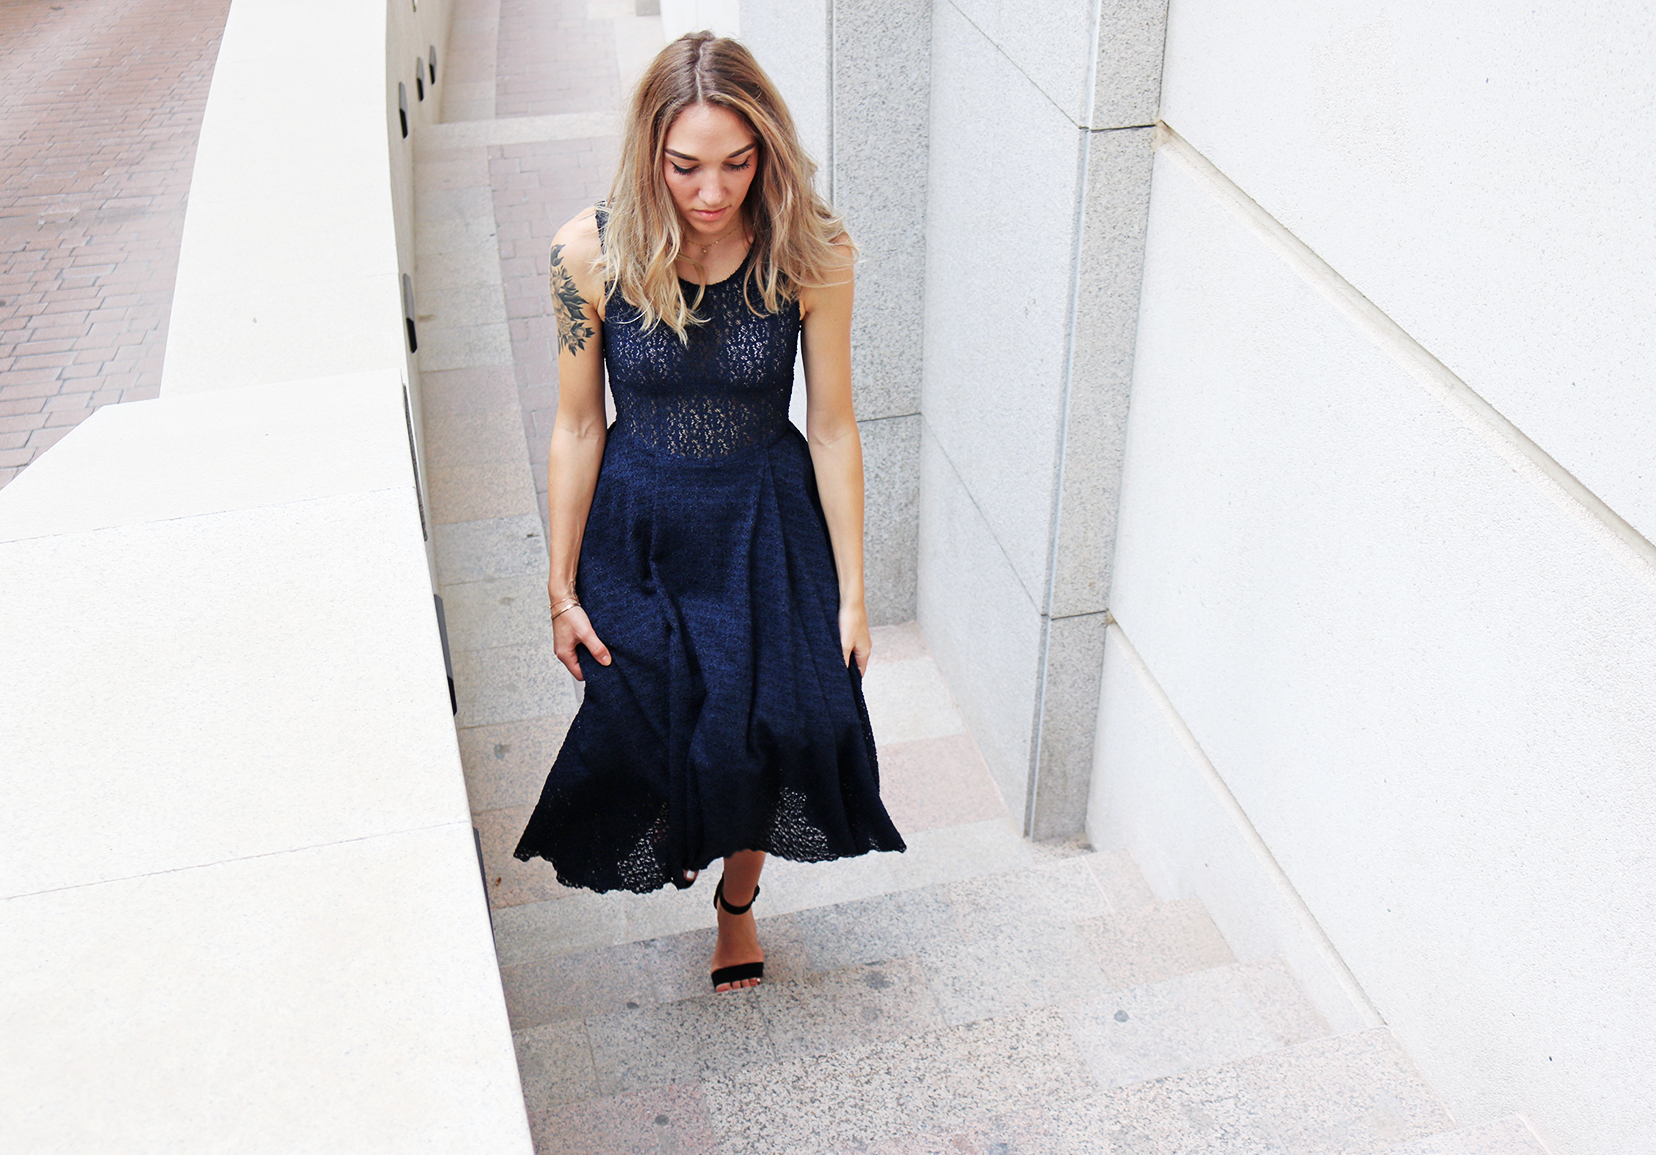
A bit of a blast from the past, but I here goes.. Somehow the image of this dress from the Katie Emilio FW 2015 collection had burnt itself in my mental sewing files. My dreams of finding that same kind of lace did not materialize over the past year that I searched, so the result was something pretty loosely inspired by the original (come to think of it, the main shape is pretty close to this dress from a couple months back). I'm willing to bet though that the stretchy lace I used resulted in a piece that wins in the comfort department. Ability to eat cake > Posing stiffly
Tutorials take a lot of time & effort to create, and I choose to make mine available for free. If you enjoy this guide, you can support me with a donation that feels right for you, here.
TOOLS:

Stretchy lace (depending on desired lenght, I used 3 m) x Scissors x Fabric marker x Pins x Thread, sewing machine x Long invisible zipper (40 cm or so)
I. I started with the easy part, cutting out my skirt. I wanted it pleated so I added 40 cm to my waistline of 70cm, to get a total waistline length of 110 cm. From that, to make a half-circle skirt, I got a radius of 34 cm. My skirt length was about 90 cm.
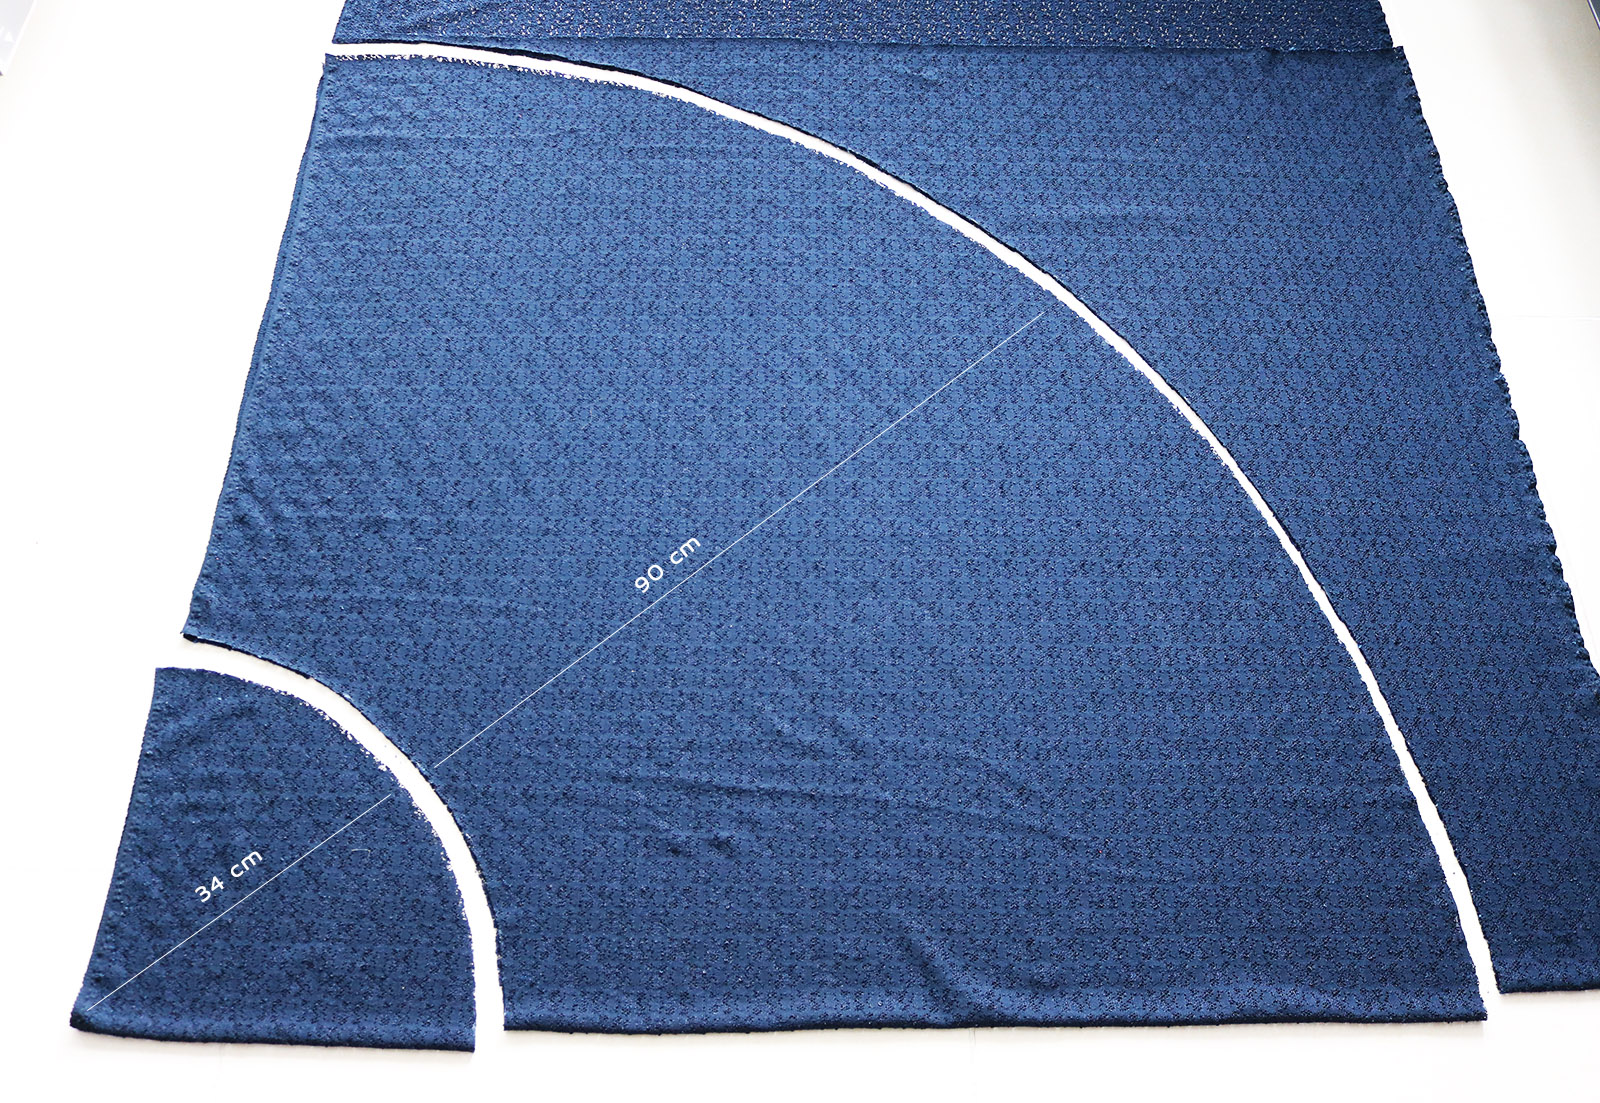
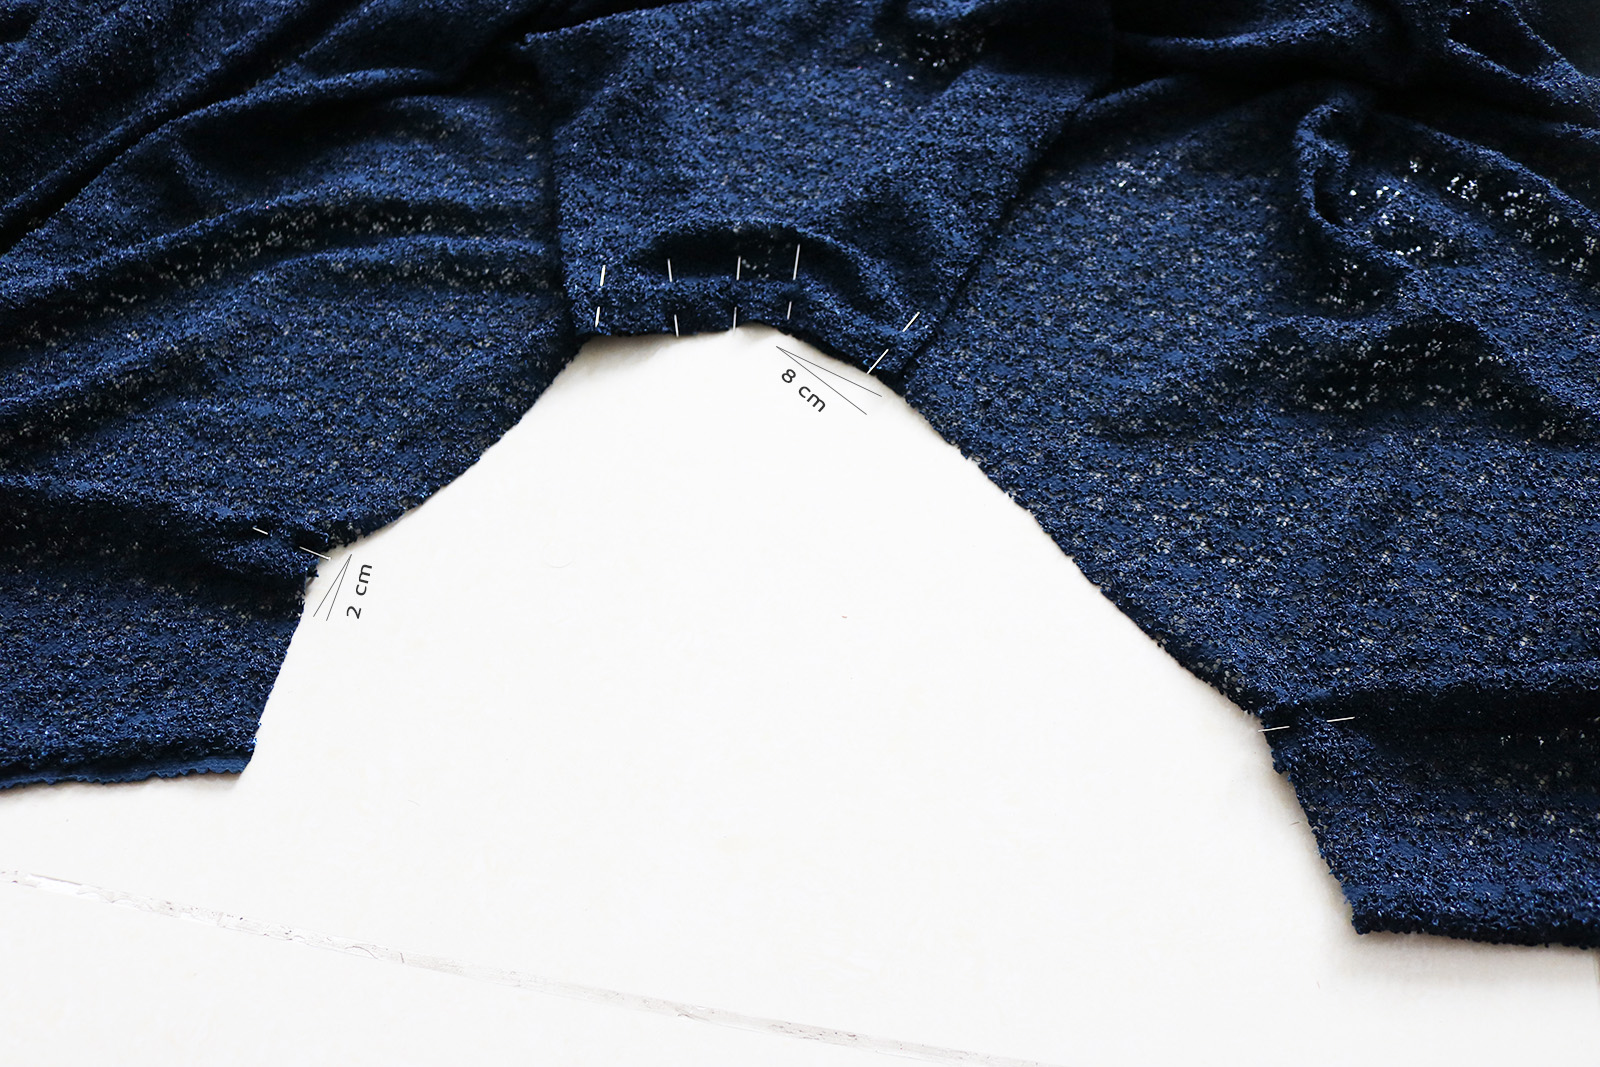
II. To create my pleats I first added the below folds - a box pleat of 8 cm on each side in the center front, and two basic 2 cm pleats on each side in the back. However due to the pretty high degree of stretch in my fabric, I ended up adding another two pleats in the back to get the total length of the waistline back to my waist circumference + 2 cm for seam allowances.
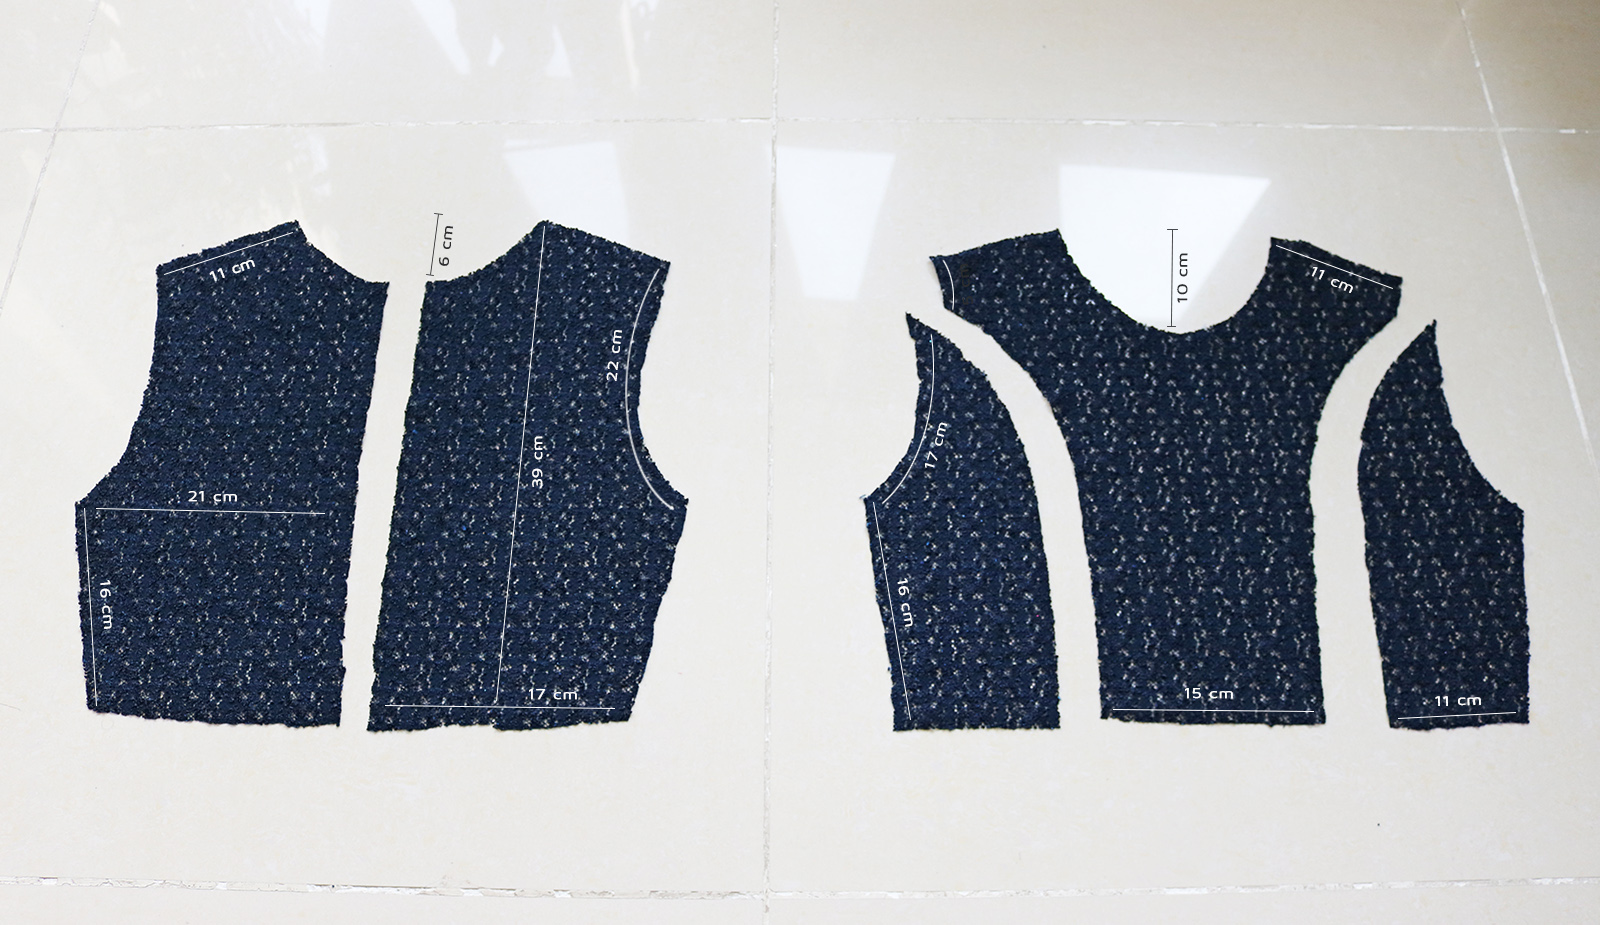
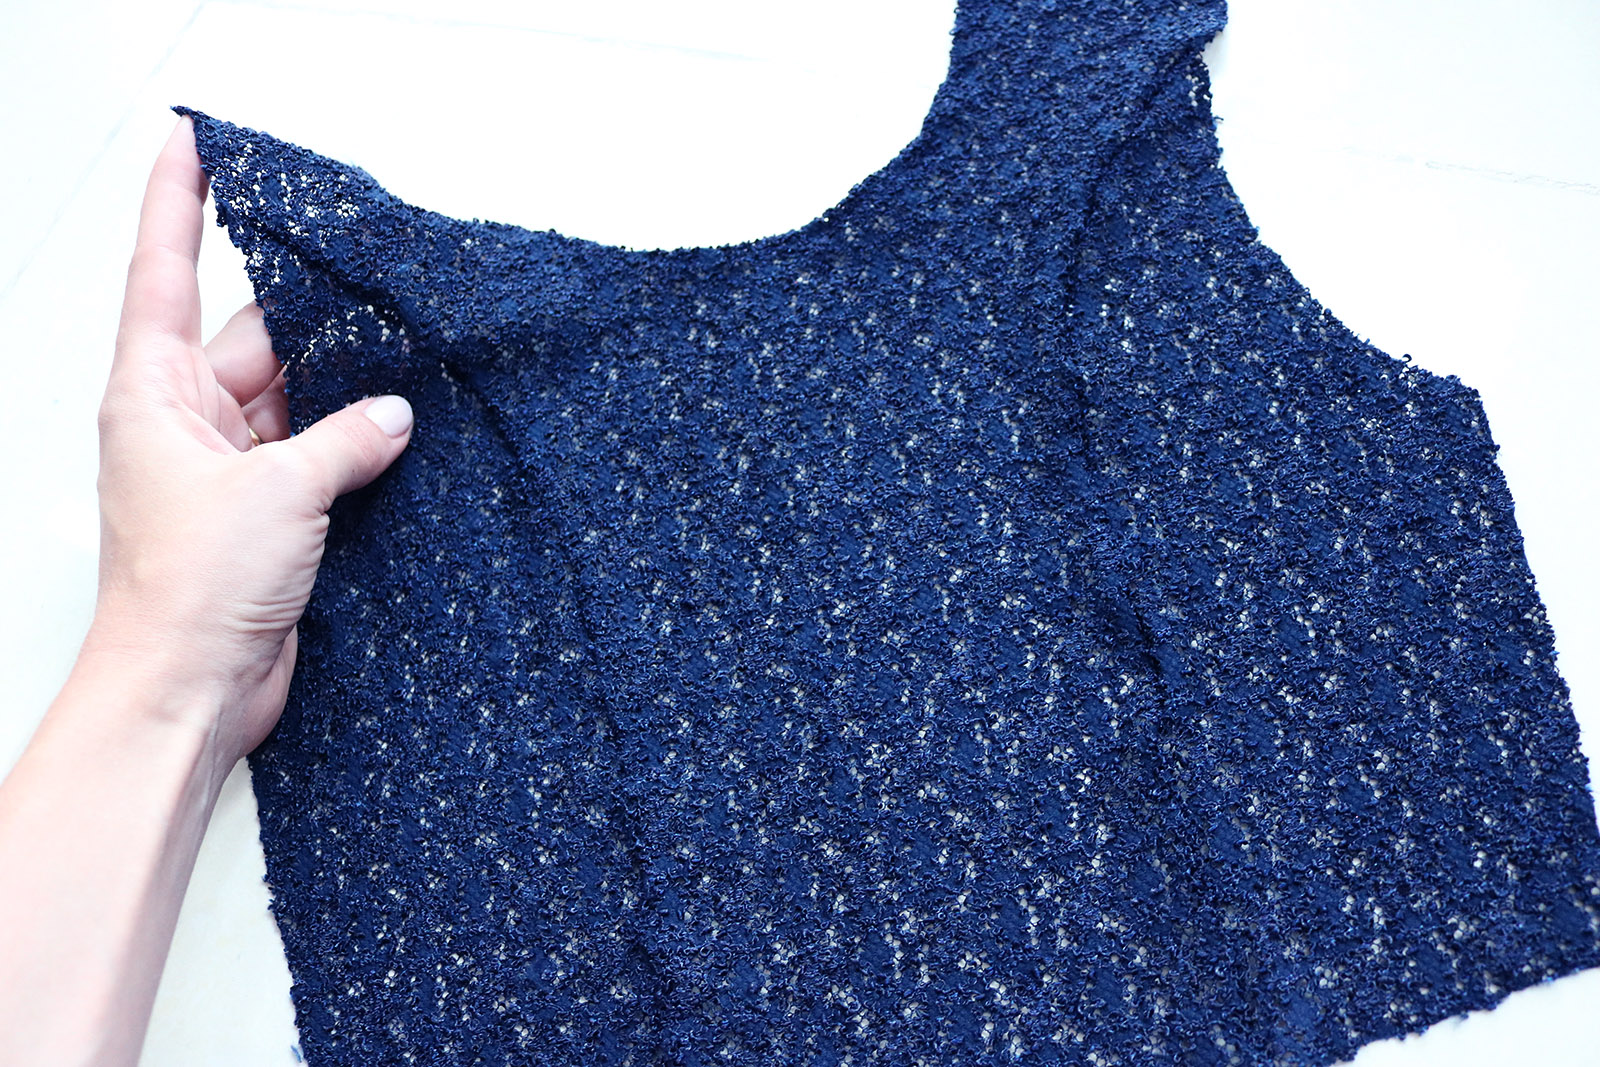
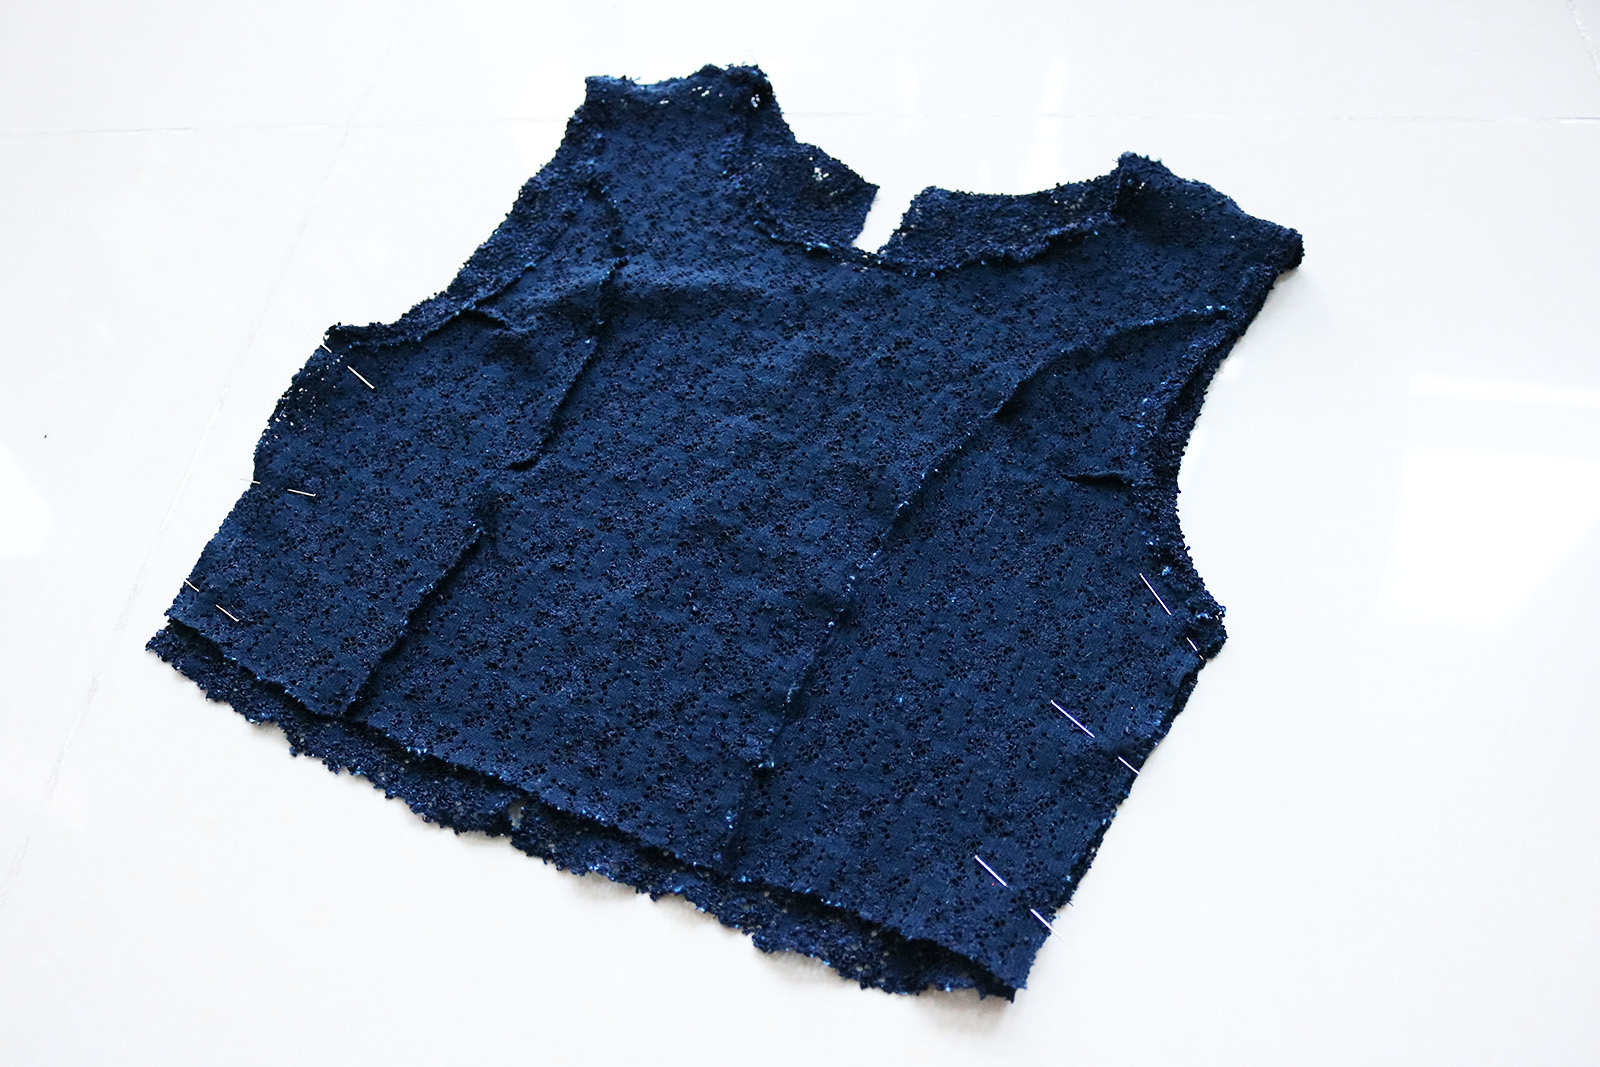
III. Next I cut out the top pieces, like this.
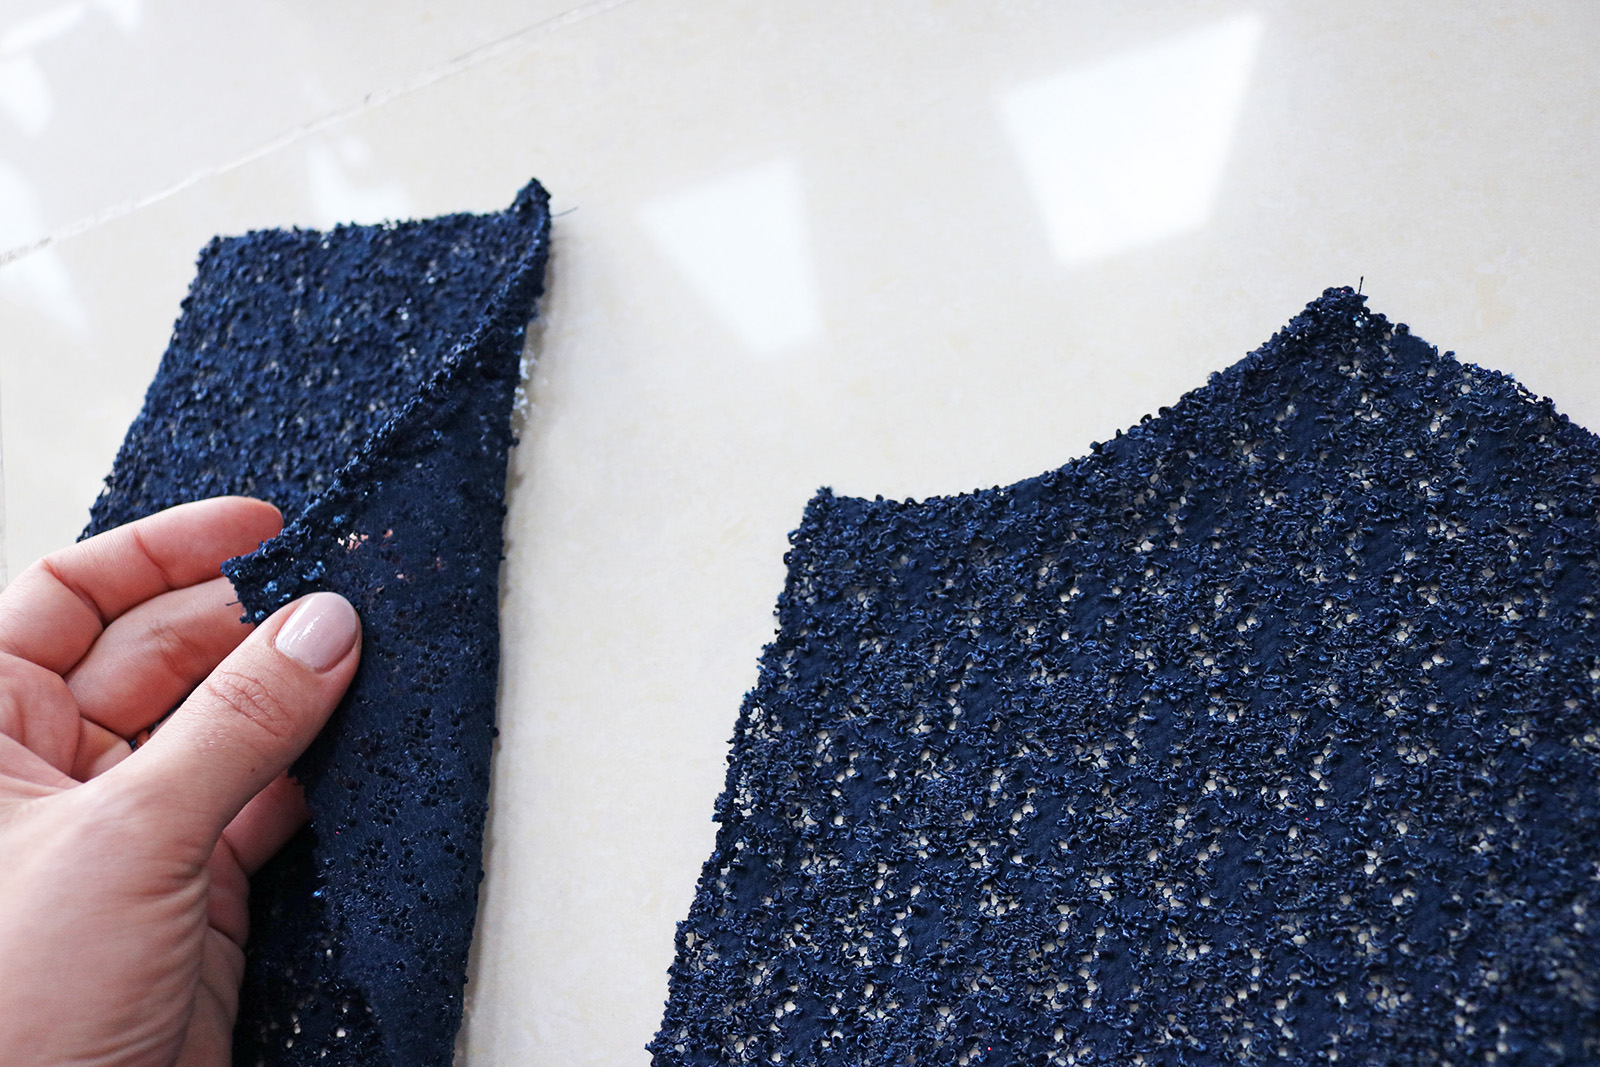
.. My fabric was ridiculously forgiving in terms of the stretch, didn't even need to add any darts! Just pinned the front side pieces to the center bit, right sides facing..
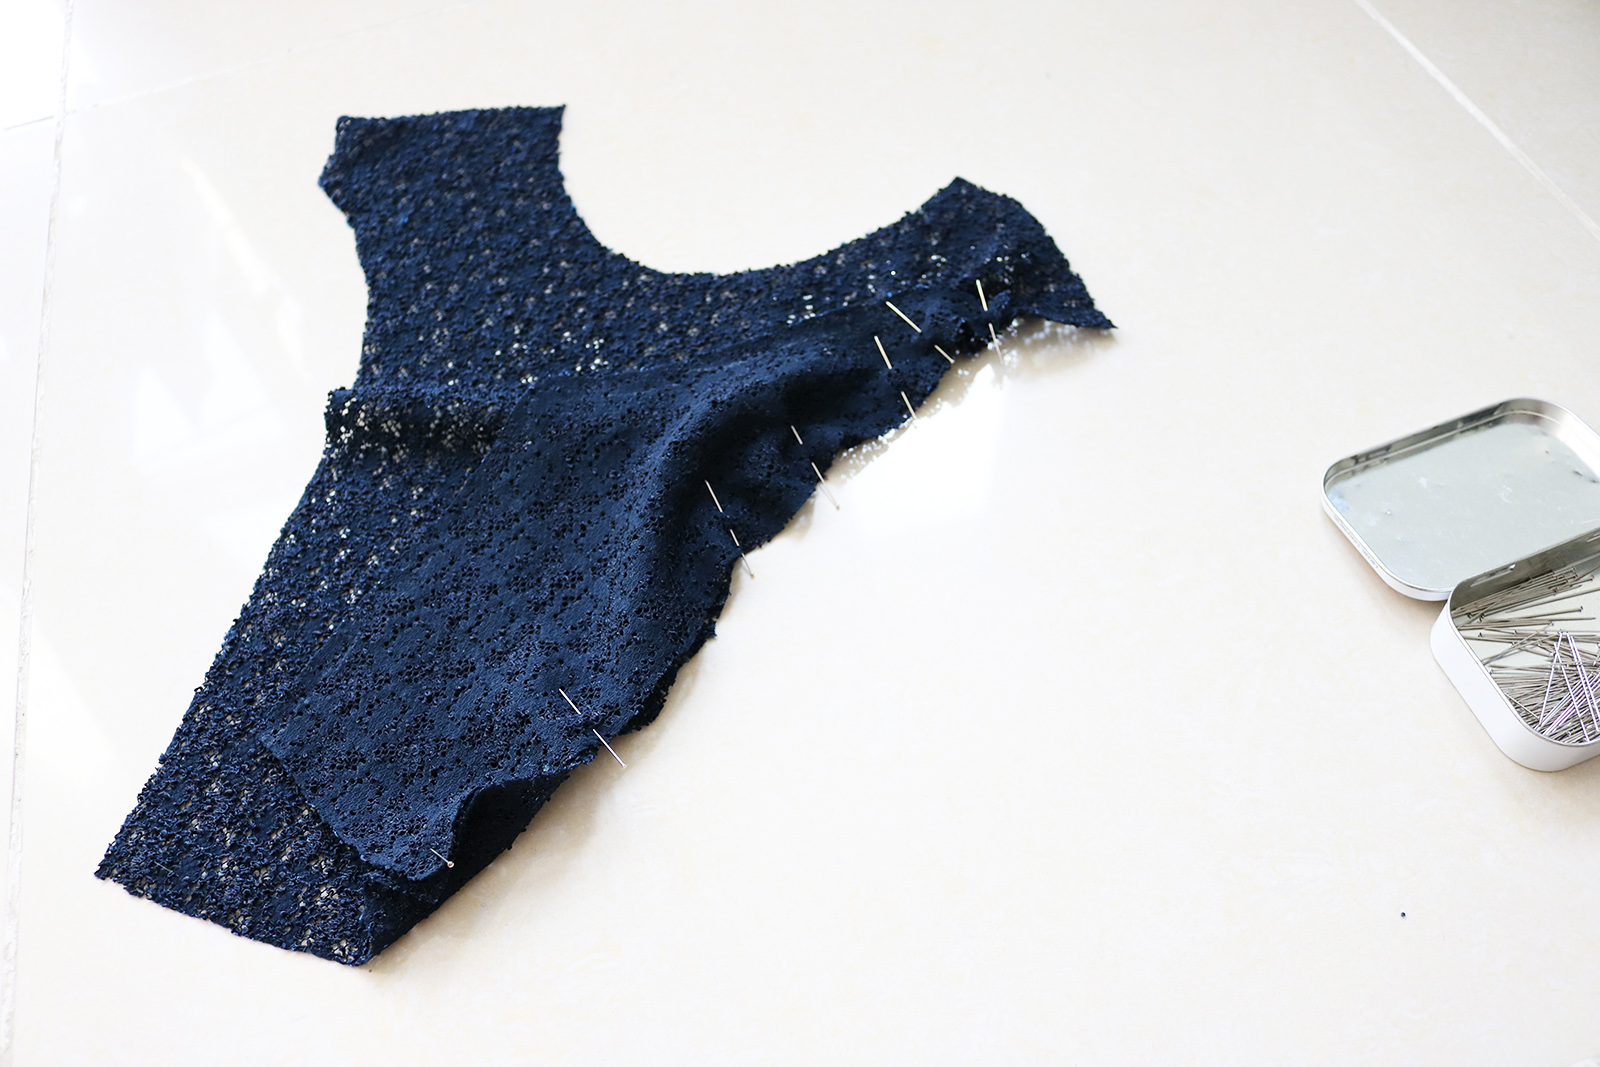
.. And sewed them in place, getting me to this stage.
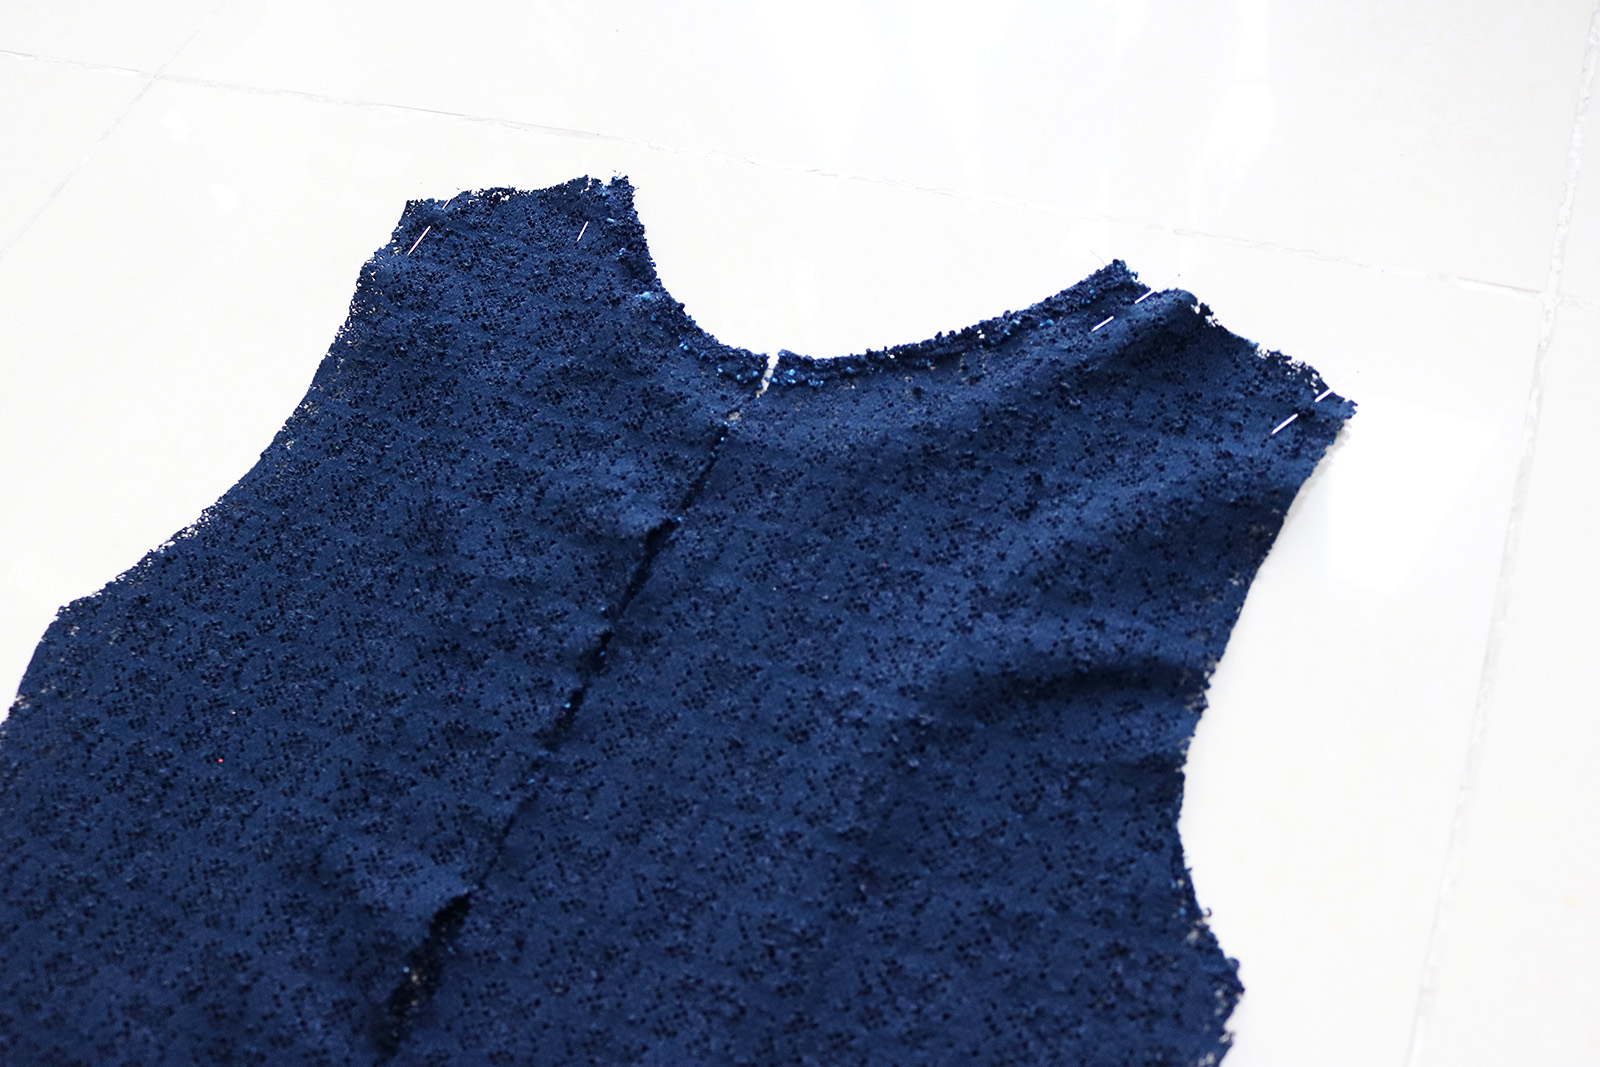
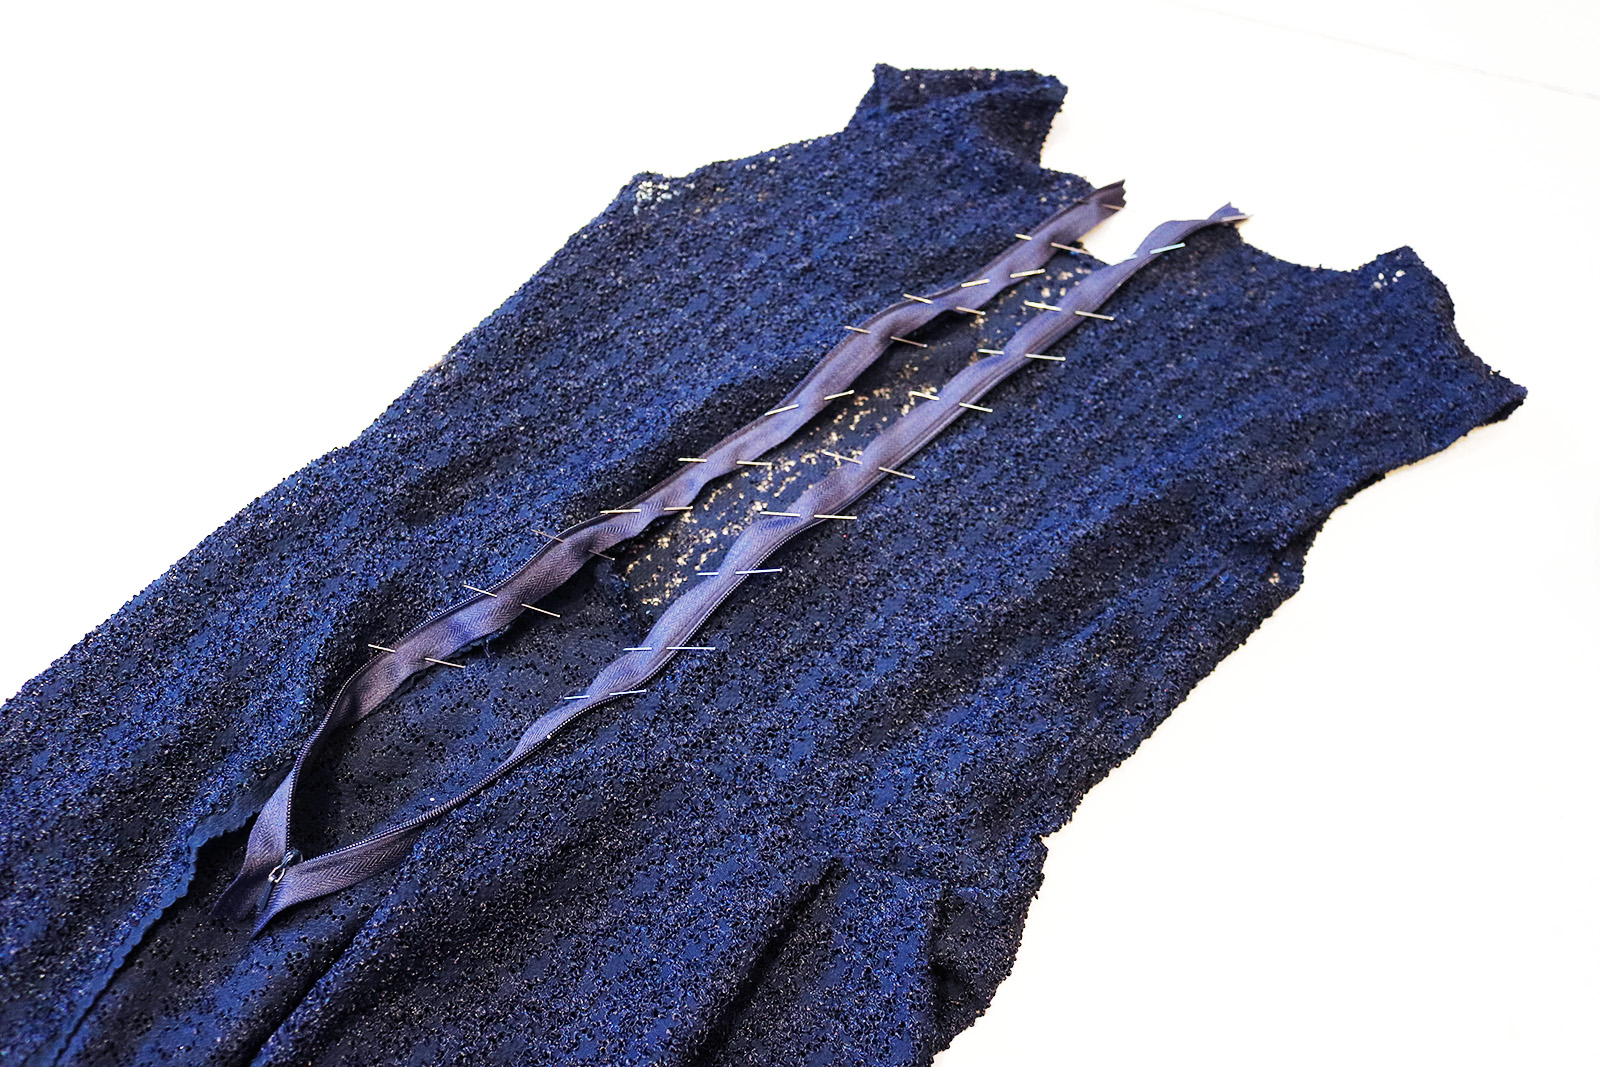
IV. I then finished the neckline with a zig-zag and just a single 1 cm fold, secured in place with a stretch stitch. Also zig-zagged the raw edges of the back center seam.
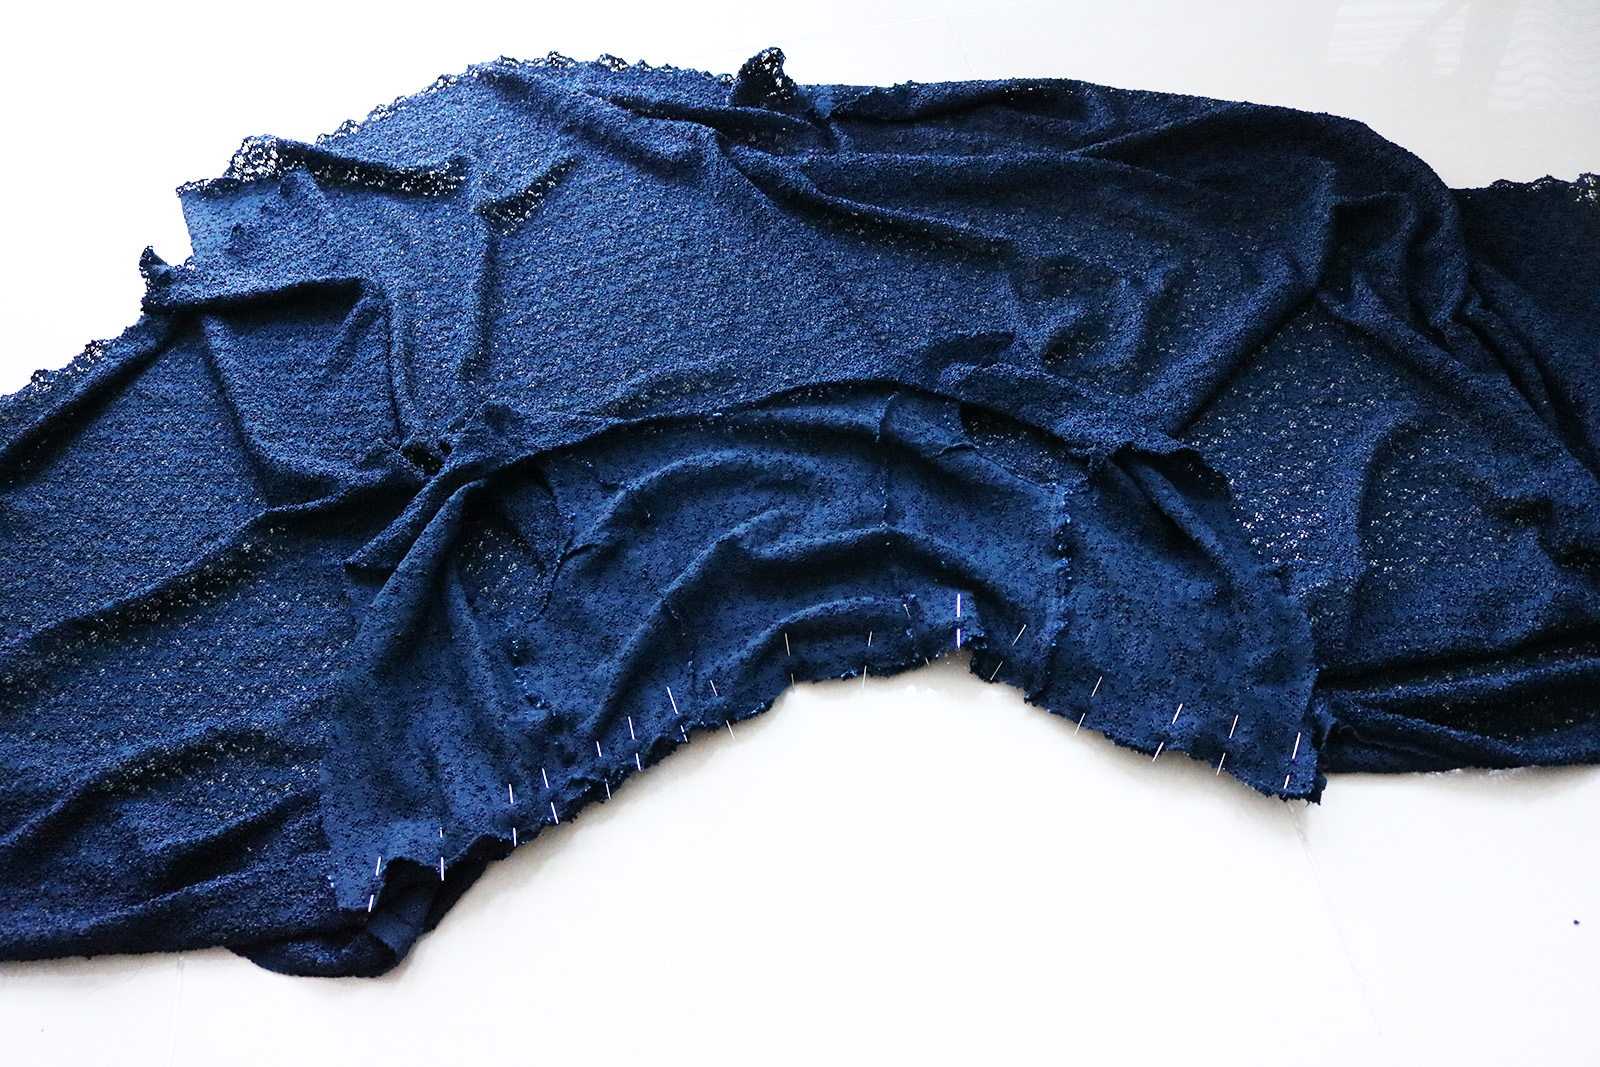
V. Then pinned the back pieces to the front piece at the shoulders, right sides facing, and sewed together, finishing the seam allowance with a zig-zag and pressing flat.
VI. Finished the arm holes the same way I did the neckline, to get to this.
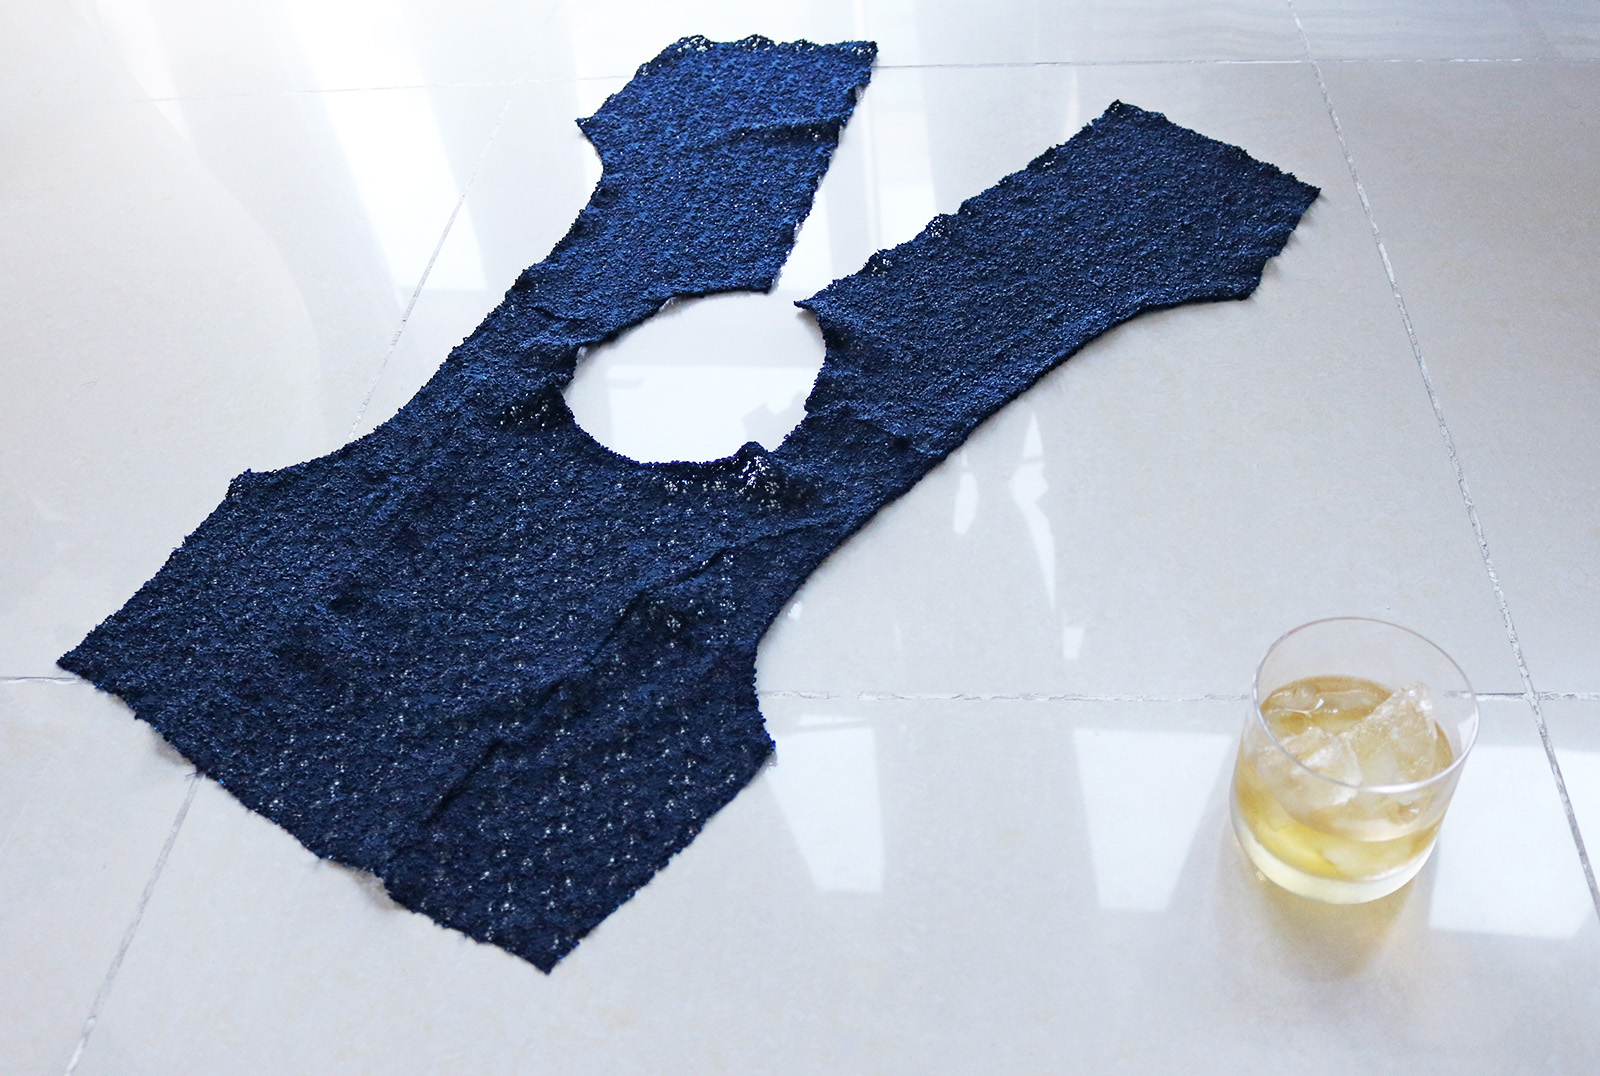
VII. To finish off the top part, just pinned and sewed the sides.
VIII. And, to attach the skirt to the top, placed the waistlines together, right sides facing, pinned together, and sewed using a stretch stitch.
IX. Finally, just attached my invisible zipper to the back, hand-sewed the ends of the zipper flat at the neckline, and sewed the remaining open back of the skirt together.
The hem I just finished with a zig-zag - because of the quality of the fabric, my thread just melted right into the texture so I was happy with the raw-but-not look. Worn below with a vintage lace petticoat underneath.

xo,
Julia


Wow, so gorgeous. Your makes rock!
ReplyDeleteThanks so much Carmen!!
Delete